
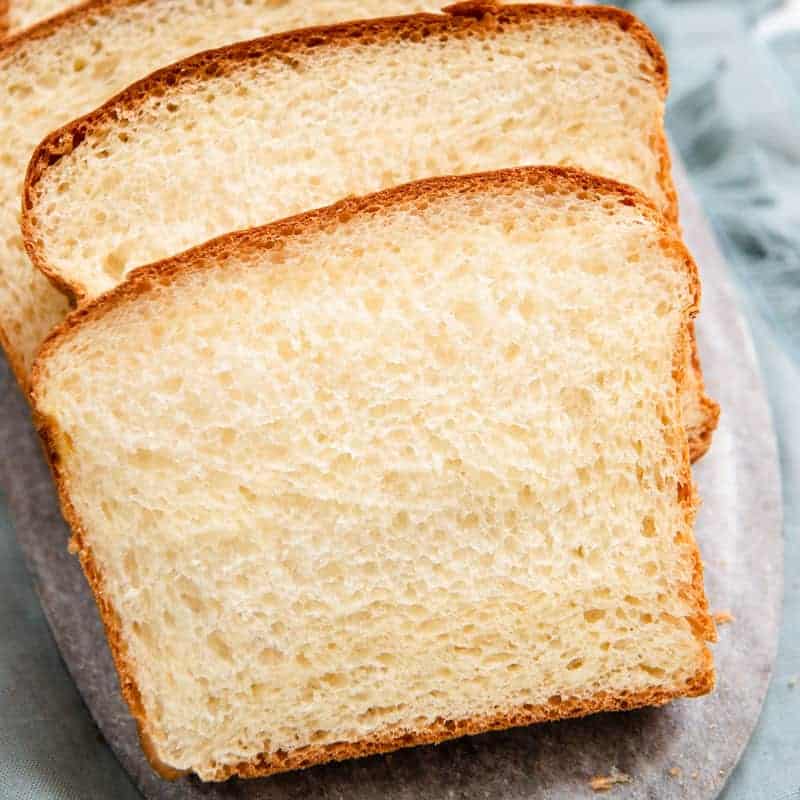
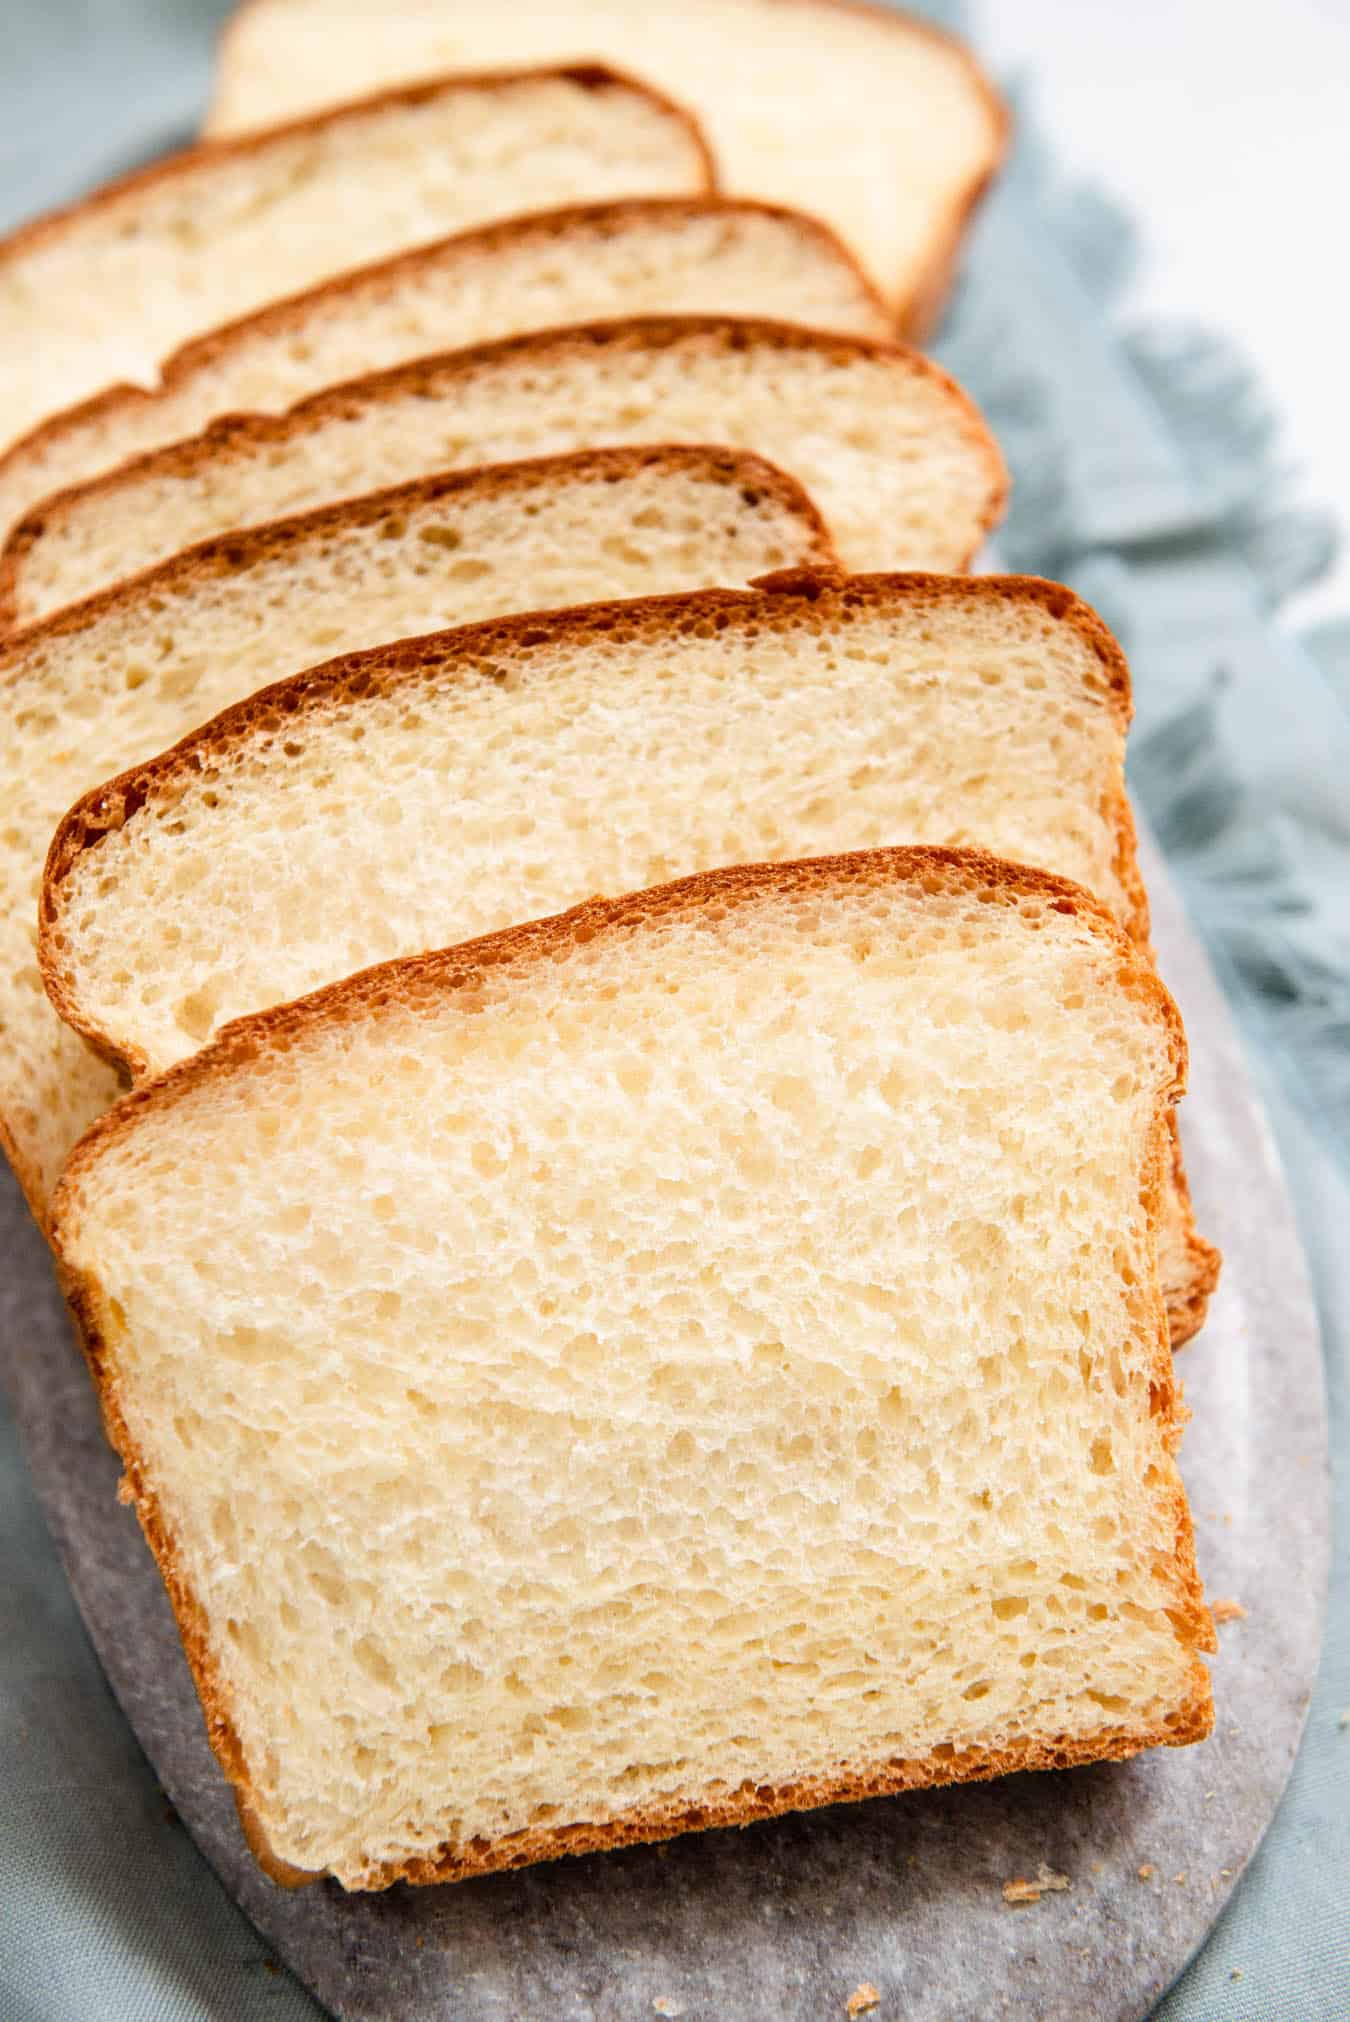
Japanese milk bread is the best sliced bread. The loaves have a golden crust and a phenomenal soft, airy crumb. Each slice is rich in milk and buttery flavor, which makes it absolutely irresistible. Here is a comprehensive guide on how to make milk bread.
Thank you to Bobs Red Mill for sponsoring this post!
Milk bread was a staple of my youth. My brother and I delighted in toasting sliced milk bread and serving it with a drizzle of condensed milk. It was our pastime to eat milk toast and watch baseball together. Every time I buy milk bread, I recall these fond memories I had with my brother.
Childhood memories aside, I wanted to develop a milk bread recipe because it is the key to understanding how to make Asian-style baked goods. Many Asian pastries, such as pineapple buns and BBQ pork buns, use some form of milk bread as the dough. Hopefully, by mastering milk bread, I will be a step closer to making more Asian pastries at home!
WHAT IS MILK BREAD?
Before diving into the details of the baking process, let me go over some background on milk bread. Often referred to as Japanese milk bread or Hokkaid milk bread in English, this enriched bread is known for its feathery center and its lightly sweet, milky flavor. In Japanese, this type of bread is called shokupan (), which is a regular loaf of bread that you slice and eat.
The exact origins of the bread is unknown. Some sources say that the bread was developed in Japan in the 20th century, while others say that it was the 19th century.
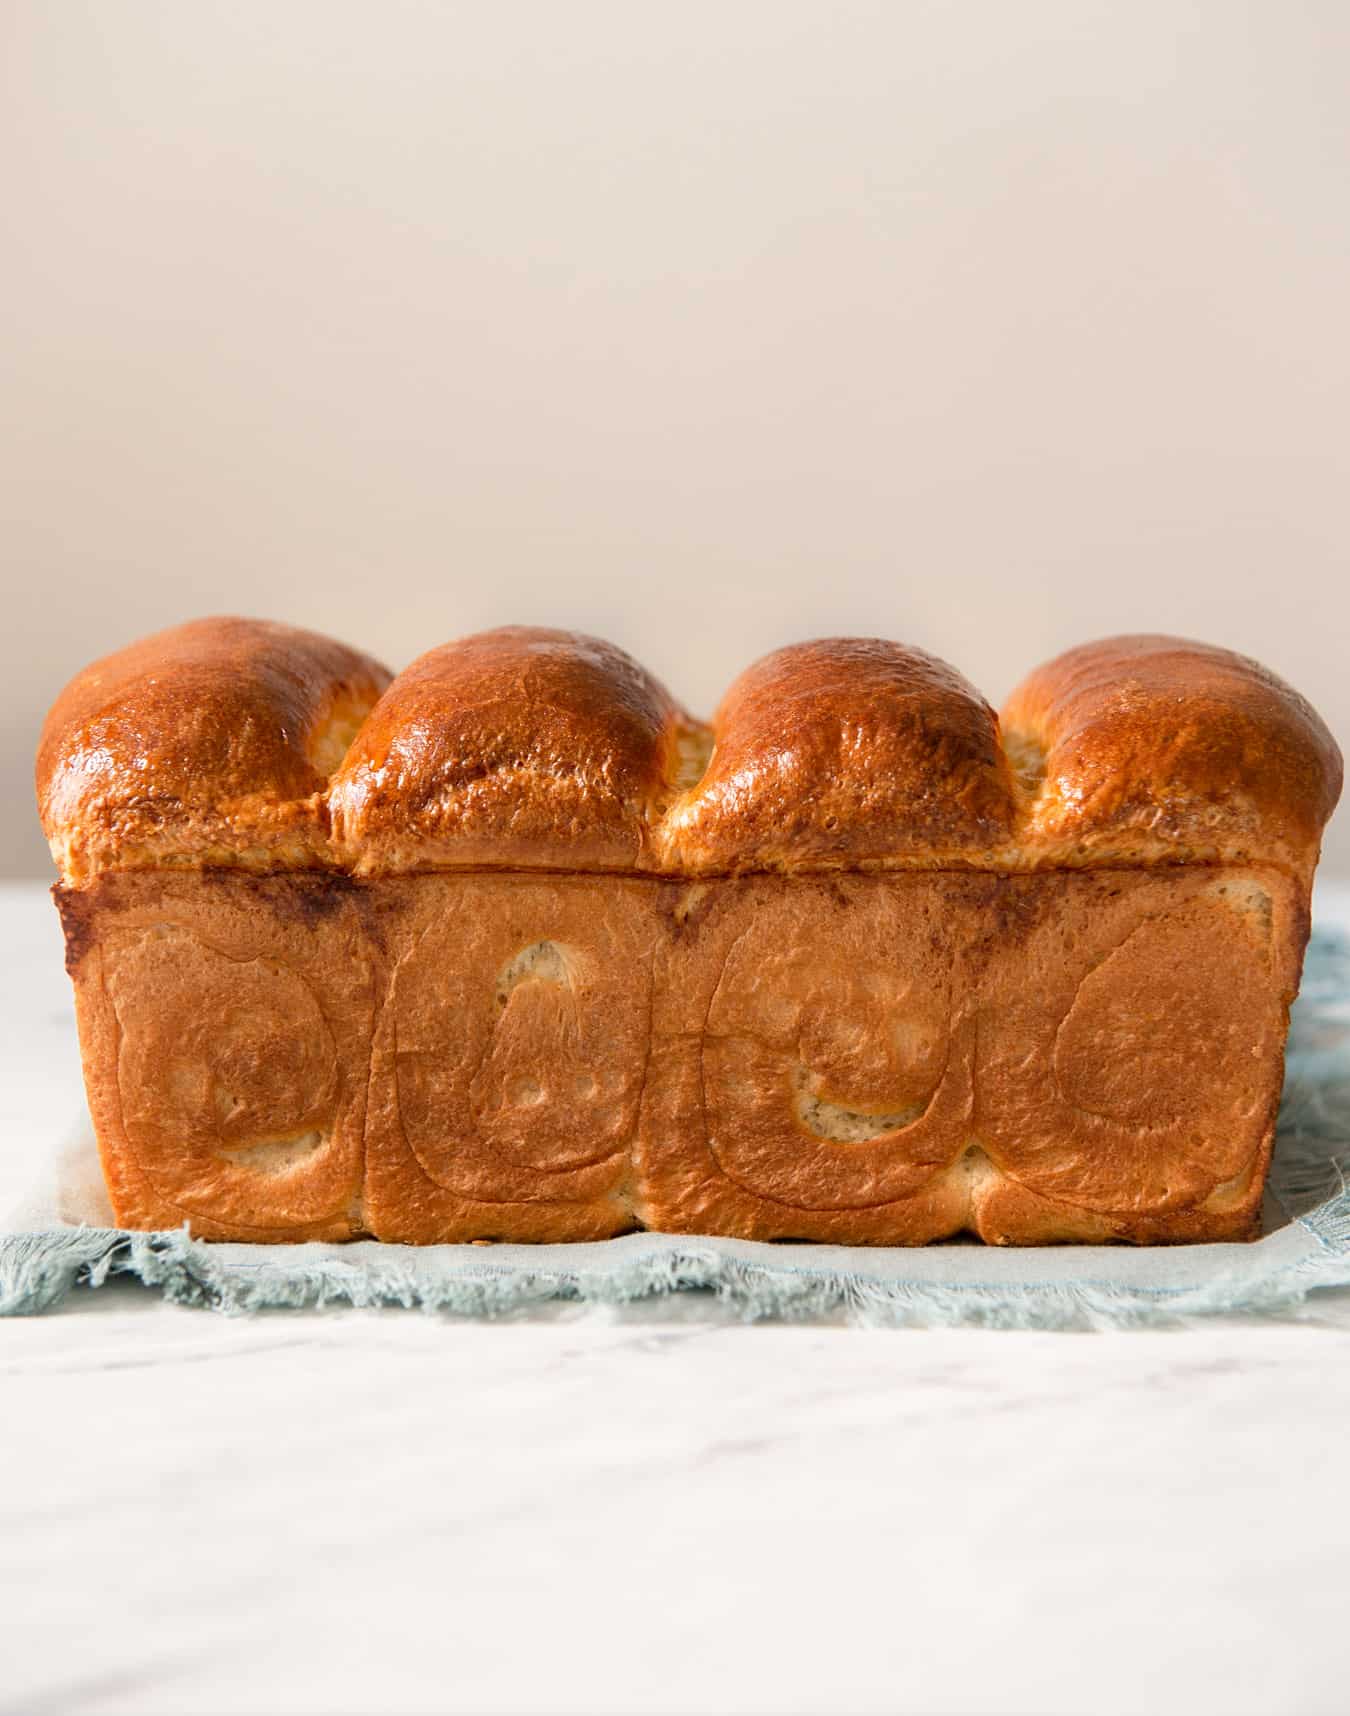
There are two common shapes for milk bread: the boxy, rectangular loaf kakushoku, () or the domed, mountain-shaped loaf, yamagata shokupan (, sometimes also written as ).
This recipe walks through how to make the domed loaf. Because it doesnt require a Pullman loaf to make, this version is more accessible to the average baker.
TIPS ON HOW TO MAKE MILK BREAD
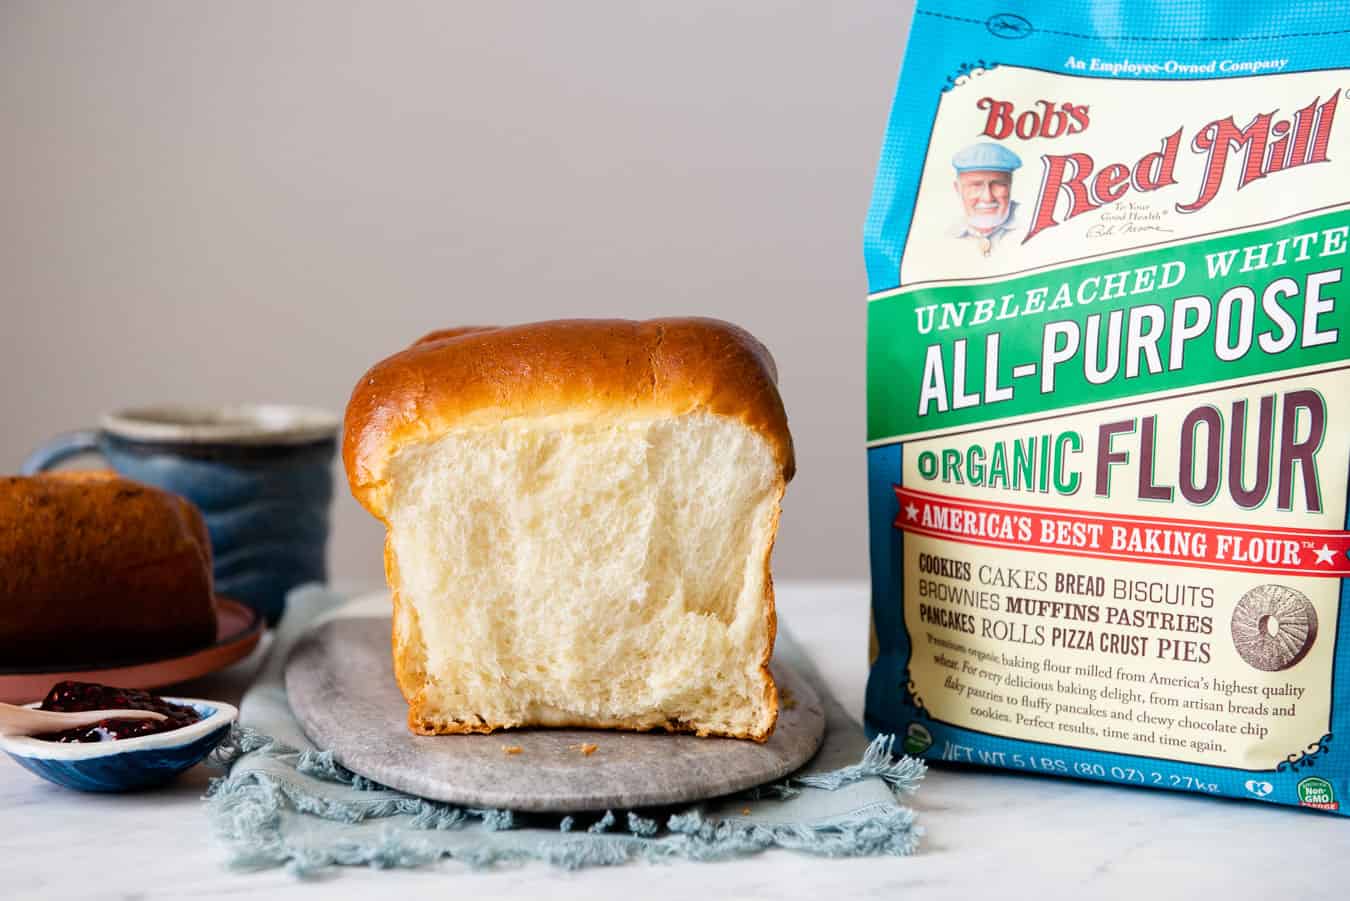
ALL-PURPOSE VS. BREAD FLOUR
Most milk bread recipes use bread flour because of the higher protein content, which gives the bread a chewy texture. However, I used Bobs Red Mills Unbleached Organic White All-Purpose Flour for this recipe because it is something were more likely to have it in our pantries. Plus, all-purpose makes delicious milk bread.
During my (many) test batches of the recipe, I compared the results between doughs made bread flour and all-purpose flour. Overall, both types of loaves were very similar. Loaves made with bread flour were slightly chewier and had prettier swirls along the sides of the bread. However, the loaves made with all-purpose flour were softer, which I prefer.
TANGZHONG & FAT: THE KEY TO SOFT BREAD
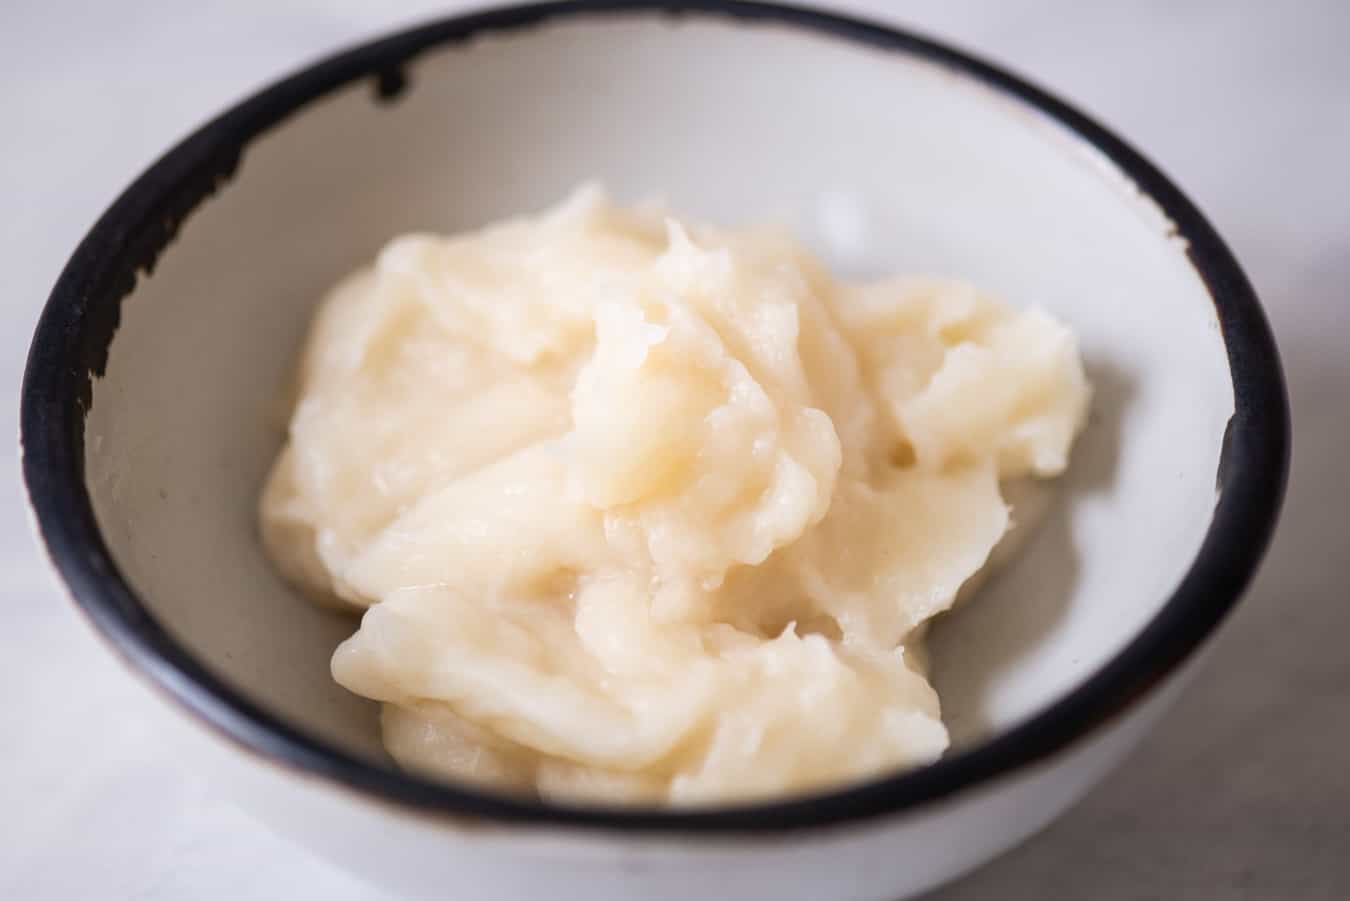
Tangzhong () is a Chinese technique of heating flour and water into a paste that is then added to the bread dough. The consistency of tangzhong is similar to a roux (see photo above). Once cooled, add the tangzhong with the other ingredients for the dough. The tangzhong helps give the milk bread its feathery texture.
Milk bread is a type of enriched bread, which means it relies on fats to give the loaf its soft texture. Use whole milk for the recipe. I also like to use butter to give the bread more aroma. However, you can also substitute the butter with neutral-flavored oil, like safflower or vegetable oil.
ACTIVATING DRY YEAST
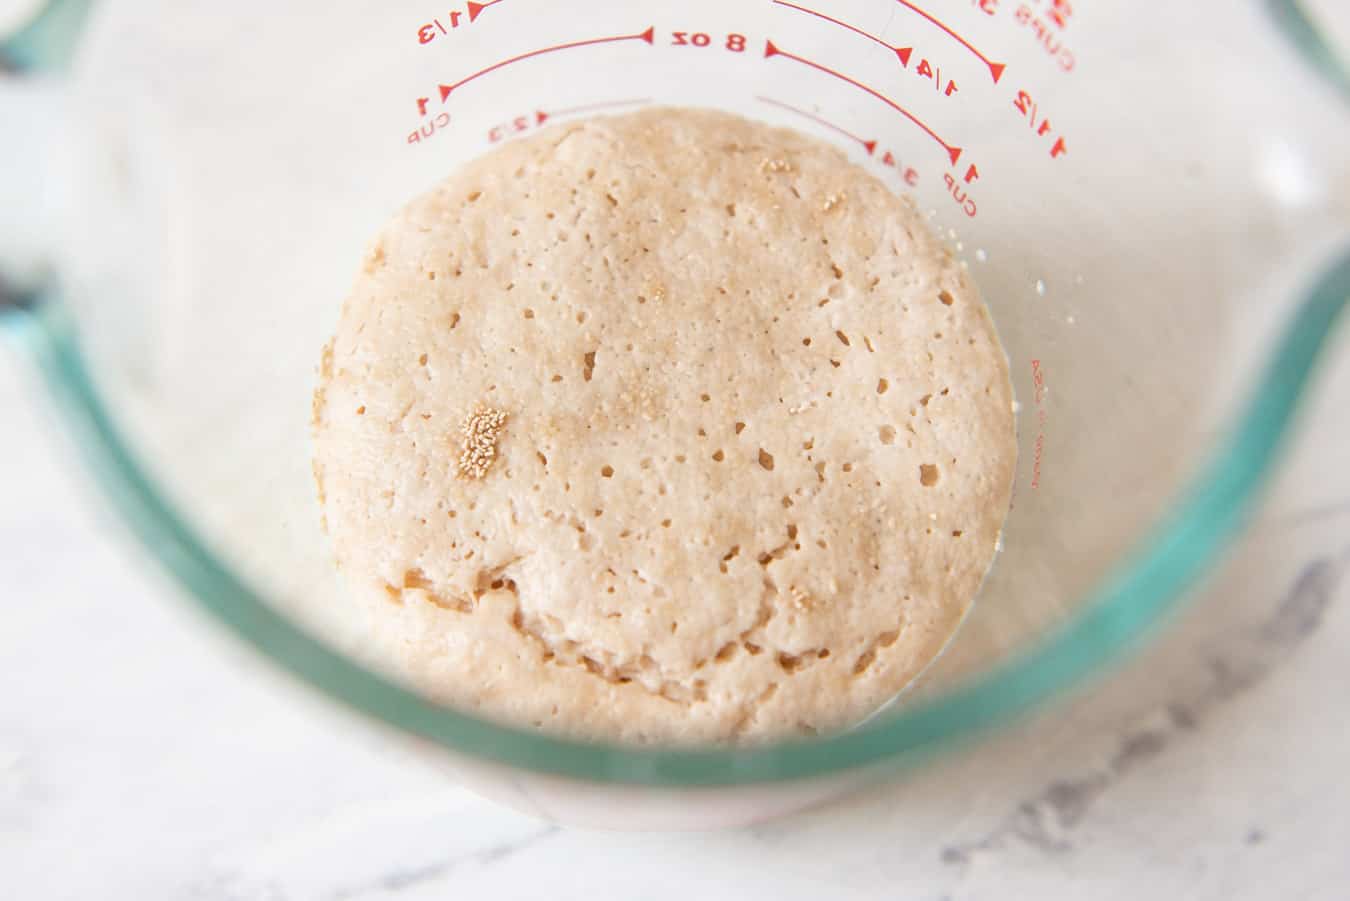
I use dry yeast to give the bread its lift. To activate the yeast, heat up some milk before mixing in the yeast. I do so by microwaving the milk for 30 to 40 seconds. Then, I add 1 tablespoon of sugar into the heated milk and check the temperature. It should be somewhere between 110F to 120F. If the milk is much warmer, the heat can kill the activity in the yeast. Once you confirm that the milk is at the right temperature, stir in the yeast.
After about 5 to 8 minutes, the yeast should foam up, like you see in the photo above. If the milk still looks flat, it can mean that the yeast is out of date or the milk was too hot.

MAKING THE DOUGH
Because of the amount of liquids and fats in the dough, I highly recommend using a stand mixer. I usually mix the dough on low until there isnt much loose flour on the edges of the mixing bowl (see photo above). Then, I increase the speed to medium-low and let the mixer work the dough for 8 minutes.
After 8 minutes, turn the dough over a lightly floured surface and knead it a few times. The dough should be smooth and soft. Then, shape the dough into a ball and place inside a greased bowl. Cover the bowl with plastic or a silicone lid, and let the dough rise for an hour in a warm place.
CAN YOU MAKE THE MILK BREAD DOUGH AHEAD?
Yes! If you like to break up the work, you can refrigerate the dough overnight. Place the ball of dough into the greased bowl, cover with plastic wrap and refrigerate. The cold temperatures of the refrigerator will slow down the activity of the yeast (it doesnt eat the sugars as quickly). As a result, the dough develops more flavor.

SHAPING THE LOAF
After the first rise, punch down the dough to release the air. Then, divide the dough into 4 pieces. The dough will be about 710-720 grams, so each piece should be about 177-180 grams. By the way, this is about as good a time as any to mention that I recommend using a scale to weigh your ingredients and dough.
On a lightly floured surface, take one of the 4 pieces of dough and knead it several times to release excess air. Then, knead it into an oval shape (see photo above). Lightly dust the top of the dough. Use a rolling pin to roll out the dough. As you roll the dough, youll probably notice air bubbles forming around the edges. This is particularly true for dough made the same day. Try to pop those bubbles as you roll. This helps to prevent large air pockets from forming inside the bread.
Now that you have a large flat oval, make an envelope fold. Take the bottom third of the rolled out dough and fold it upwards towards the center. Then, take the top third of the oval and fold it down. You should have somewhat of a rectangle at this point.

Rotate the dough 90 degrees so that a short side of the rectangle is facing you. Lightly dust the top of the dough with flour.
Next, roll out the dough again into a larger rectangle that is about 9 inches by inches. Starting from one end, roll the dough into a log. After the dough is rolled up, place it in a 95-inch loaf pan. Make sure to set the roll seam side down. The bread pan does not need to be greased. Repeat with the remaining 3 pieces.

THE SECOND RISE
The trickiest part about making this bread is knowing when the second rise is done. I messed this part up about 5 times and baked the bread too early. Instead of doubling in size, you want the loaves to triple in size with the second rise. The two loaves in the center should rise just over an inch above the top lip of the bread pan. (By the way, its not unusual for the loaves on the edges to rise slightly higher.) When you gently brush the tops of the bread, it will feel like the loaves can be easily deflated.

It is important to be patient with the second rise because this helps the tops of the bread to bake evenly. If you stick the bread into the oven too early, youll notice that the fully baked bread will develop massive tears on the top, like you see in the photos above. The rips are a sign of underproofed bread. The bread is still edible, its just not as visually appealing.
Heres some more bad news: the second rise can take forever. I worked on this recipe in the winter months, and it took at least 2.5 hours for the bread to rise to the desired level on my countertop. If you are working with dough thats been refrigerated overnight, that timeline might be longer.

Because the second rise can take a long time, you may notice small air bubbles forming on the top of the loaf (see photo above). Its just the activity from the yeast eating away at the sugars. These bubbles may seem benign, but they expand and harden in the oven, creating small bumps on the top of your loaf. To prevent this from happening, I recommend using a toothpick to pop those bubbles before you bake the bread.
A SHORTCUT FOR THE SECOND RISE
If you dont have the time to wait 2.5 hours for the second rise (and I dont blame you), you can do the second rise in a warm oven. I preheat my oven to the lowest heat setting possible, which is 170F. Right when the oven reaches that temperature, I immediately turn off the oven and turn the oven light on. Then, I transfer the bread pan into the oven, uncovered. In about 55 minutes to an hour, the bread will rise to the desired level.
EGG WASH
To make the tops of the loaves even prettier, I brush a thin layer of egg wash over the tops. Its not necessary, but the bread will look golden and glossy.
One important thing to note: make sure the egg wash isnt too cold. During one of my test batches, I used refrigerated egg wash left over from the day before. When I brushed it over the proved bread, the cold temperature of the egg wash caused the loaf to deflate. The bread was still edible once baked, but the crumb lost some of the light texture.

COOLING THE BREAD
The bread takes only 28 to 30 minutes to bake. When you first take it out of the oven, the tops of the bread will be very hard. Dont worry, the bread softens as it cools.
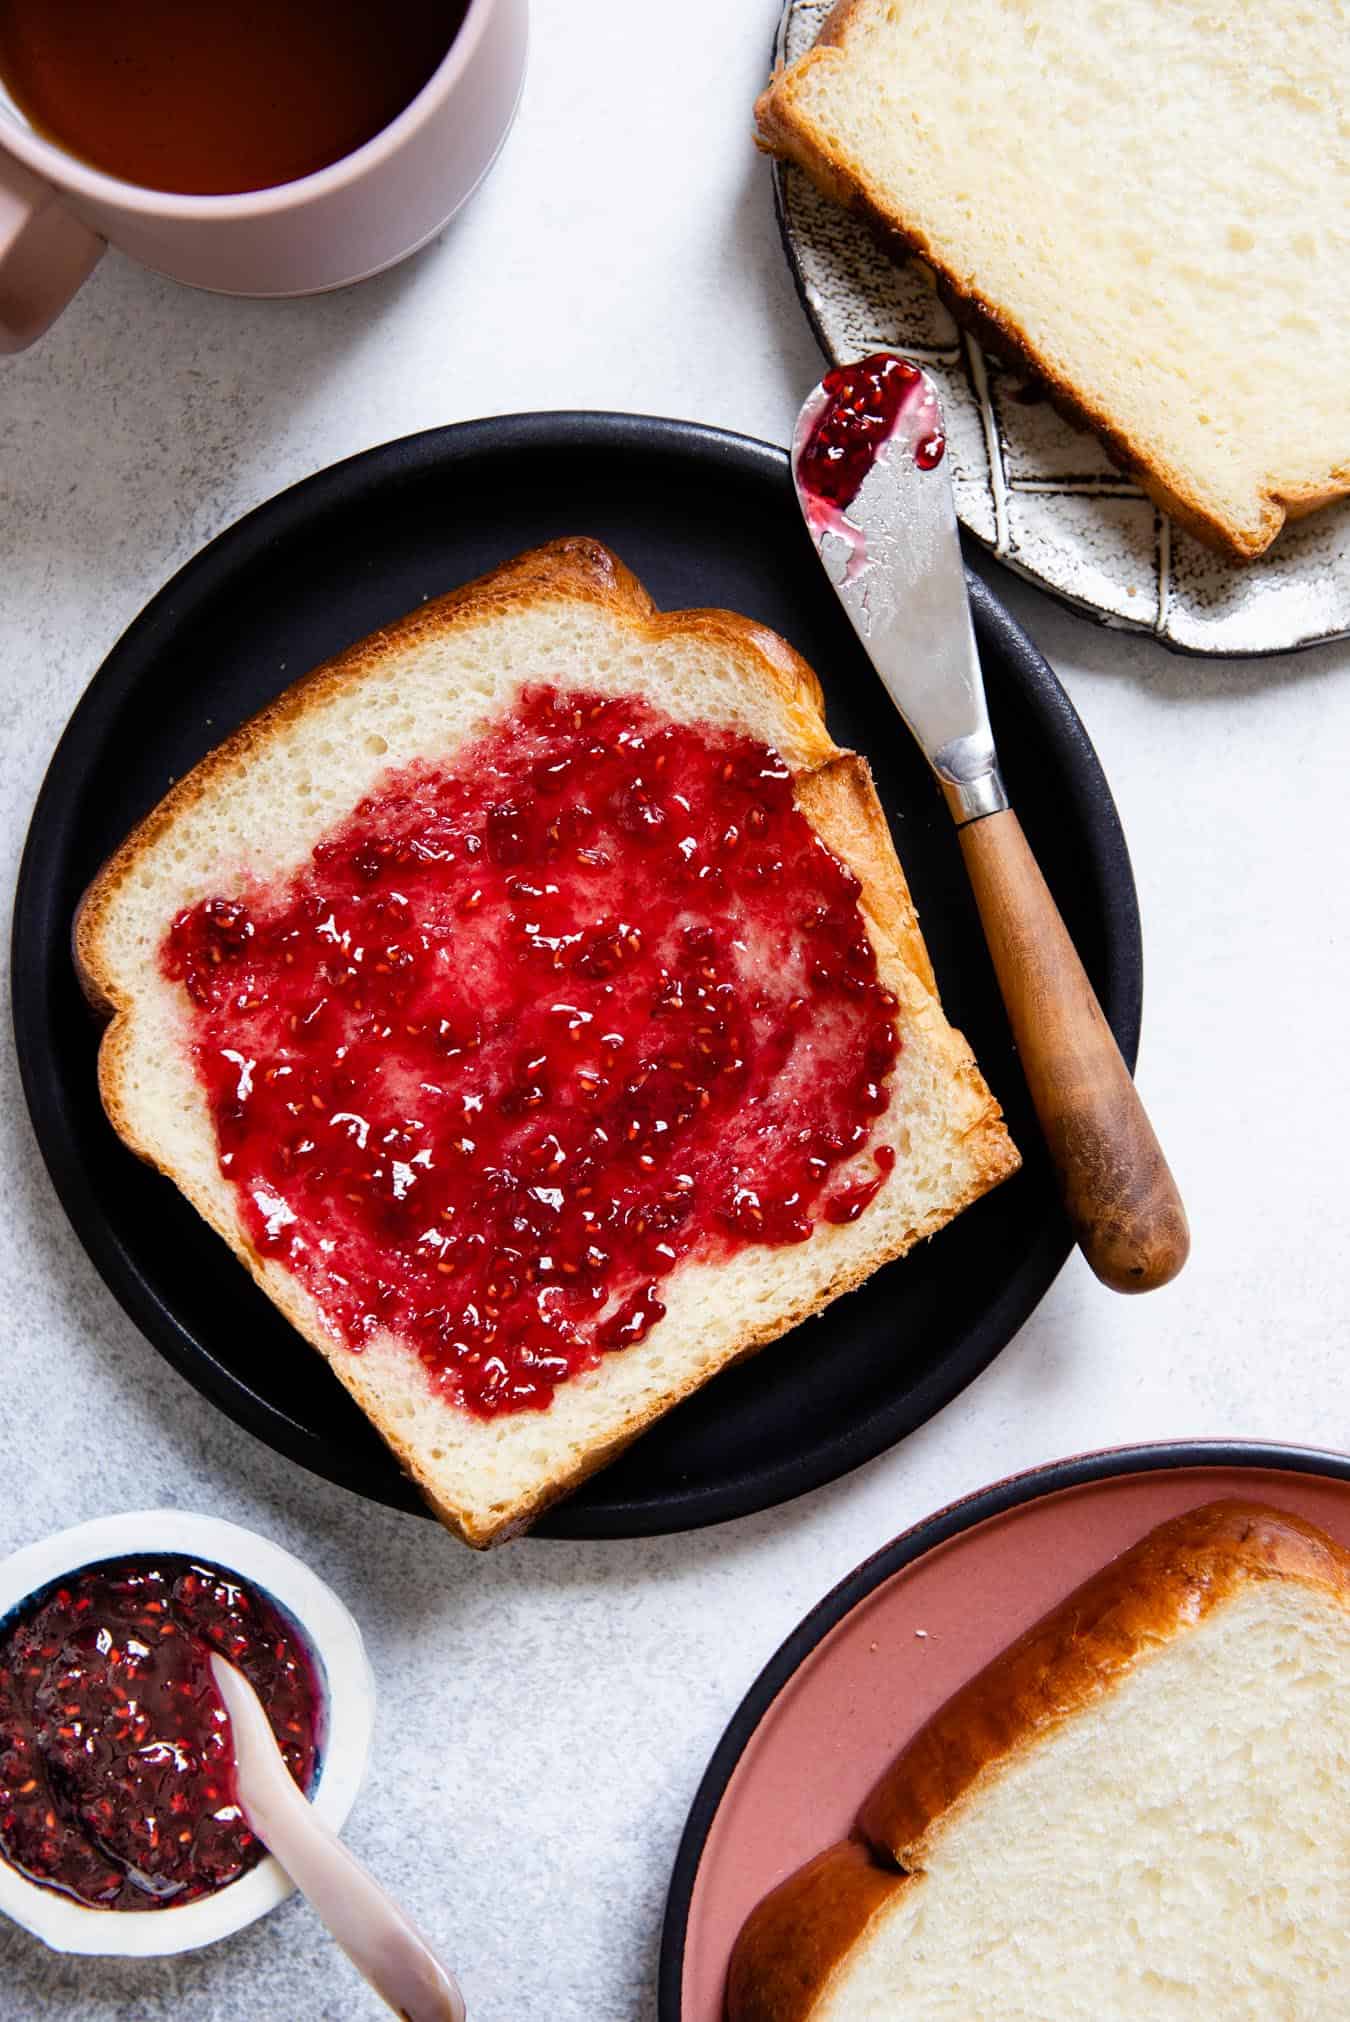
Once you let the bread cool in the pan for a few minutes, remove the bread from the pan. DO NOT let it cool inside the bread pan as moisture develops inside the pan and will turn your bread soggy. Now, youre ready to enjoy freshly baked milk bread! I love it with jam or condensed milk.
The Ultimate Guide on How to Make Milk Bread
Japanese milk bread is the best sliced bread. The loaves have a golden crust and a phenomenal soft, airy crumb. Each slice is rich in milk and buttery flavor, which makes it absolutely irresistible.
You can make the dough overnight. Simply shape the dough into a ball, place into a greased bowl and cover the bowl with plastic wrap. Then, refrigerate.
- Author: Lisa Lin
- Prep Time: 40 minutes (not including rise times)
- Cook Time: 30 minutes
- Total Time: 1 hour 10 minutes
- Yield: 1 loaf
Ingredients
Tangzhong
- 20g (2 tablespoons) all-purpose flour
- 75g (1/3 cup) water
Dough
- 115g (1/2 cup) whole milk
- safflower or any neutral oil for greasing bowl
- 12g (1 tablespoon) granulated sugar
- 5g (1 1/2 teaspoons) dry yeast
- 320g (2 cups plus 2 tablespoons) all-purpose flour (see note 1)
- 3g (1 teaspoon) kosher salt
- 60g (3 tablespoons) sweetened condensed milk (see note 2)
- 1 large egg
- 55g (4 tablespoons) butter, melted (see note 3)
Egg Wash
- 1 large egg
- 1 tablespoon whole milk
Equipment
- medium-sized mixing bowl
- stand mixer
- 9x5-inch mental or nonstick bread pan (see note 4)
Instructions
Make the Tangzhong
- Whisk the flour and water inside a saucepan until the flour dissolves.
- Place the saucepan over medium heat and stir the mixture frequently. In about a minute, the flour will start to thicken. Dont walk away during this process as you can quickly burn the tangzhong! Once the flour develops into a light paste, turn off the heat.
- Transfer the tangzhong to a bowl to cool. It will thicken as it cools.
Prepare the Dough
- Grease a medium-sized mixing bowl with oil. Set it aside.
- In a microwave-safe bowl, heat the milk for about 30 to 40 seconds. Add the sugar to the milk. Use a thermometer to check the temperature of the milk. It should be somewhere around 110F to 120F.
- Add the yeast and stir to hydrate the yeast. Let it sit for 5 to 8 minutes while you prepare the other ingredients.
- In the bowl of a stand mixer, combine the all-purpose flour and salt. Fit the mixer with the dough hook.
- Add the condensed milk, egg, melted butter, tangzhong, and foamy milk/yeast mixture.
- Mix the dough on low until you dont see any loose flour on the sides of the bowl. Then, increase the speed to medium-low and work the dough for 8 minutes.
- Scrape the dough out of the bowl onto a lightly floured surface and knead a few times. If the dough is feeling tacking, lightly dust your hands.
- Shape the dough into a ball and place inside the greased mixing bowl. Cover the bowl with plastic and let it rise in a warm area for about 1 hour, until the dough doubles in size.
Shape the Dough (Use Photos in Blog Post for Reference)
- Once doubled, punch down the dough to release excess air. Turn the dough onto a lightly floured surface. Divide the dough into 4 equal portions (they should be about 177 to 180 grams per piece).
- Take one piece and knead it a few times. Shape it into an oval. Lightly dust the top of the dough. Roll the dough into a larger oval.
- Make an envelope fold. Take the bottom third of the dough and fold it up towards the center. Then, take the top third and fold it down towards the center. The dough should now look somewhat like a rectangle.
- Rotate the rectangle 90 degrees so that a short side is facing you. Roll out the rectangle until it is about 9 x 4 inches (doesnt need to be exact). Starting from one end, roll up the rectangle into a spiraled log. Place the rolled up dough into the loaf pan, seam side down.
- Repeat with the remaining 3 pieces of dough.
- Cover the loaf pan with plastic and let it rise in a warm spot until it triples in size. The center loaves should rise just over an inch above the top lip of the pan. (See photos in post for reference.) This can take up to 2.5 hours. See note 5 for instructions on how to speed up the second rise.
Bake the Bread
- When the loaves look like it is just about done proofing, preheat the oven to 350F. Position an oven rack to the center position.
- Prepare the egg wash. In a small bowl, beat an egg. Add the milk. This helps to thin out the egg so that the egg wash brushes over the bread in a nice thin layer.
- Carefully brush the egg wash over the tops of the loaves.
- Transfer the loaf pan to the oven and bake the bread for 28 to 30 minutes, until the loaf is a deep golden color. It takes only 28 minutes in my oven.
- Take the bread out of the oven. The top of the loaf will feel very firm right now, but it softens as it cools.
- After 3 to 5 minutes, turn the loaf pan over to remove the bread from the pan. The bread should slide out easily. Do not cool the loaf inside the pan as moisture will build up inside the pan, causing the bread to turn soggy. Let the loaf cool on a wire rack. You can start eating the bread while its still slightly warm or wait for it to cool completely.
- Slice the bread and serve with jam, butter, or condensed milk. Store the bread in a container for several days.
Notes
- I recommend using a scale for this recipe. If you do not have one, make sure to use a fork to fluff up the flour before measuring it. Do not pack the flour into the measuring cups.
- I used condensed milk so that the bread has richer flavor. You can substitute it entirely with sugar or half instant milk powder and half sugar.
- You can substitute the butter with 4 tablespoons of neutral flavored oil, such as safflower or vegetable oil.
- Loaf pans come in all different sizes. Ones that are 1-pound loaf pans should be about 95 inches in diameter. For this recipe, its better to use a pan that is 5 inches wide. Try to use metal pans for this recipe as the heat transfer is better in metal pans.
- If you dont have the time to wait 2.5 hours for the second rise (and I dont blame you), you can do the second rise in a warm oven. I preheat my oven to the lowest heat setting possible, which is 170F. Right when the oven reaches that temperature, I immediately turn off the oven and turn the oven light on. Then, I transfer the bread pan into the oven, uncovered. In about 55 minutes to an hour, the bread will rise to the desired level.
Disclosure: This post was sponsored by Bobs Red Mill! To learn more about their products and to get more recipe inspiration, follow them on Instagram or Facebook.
The post The Ultimate Guide on How to Make Milk Bread appeared first on Healthy Nibbles.