Extreme How To - DIY Home Improvement
Featuring MoistureShield Elevate Composites and CAMO® EDGE Clip® Fasteners
by Matt Weber
The huge outbuilding that Joey Prestage built as his Man Cave needed a deck. It sits on a beautiful lakefront lot which requires a comfortable place to sit and enjoy the view.
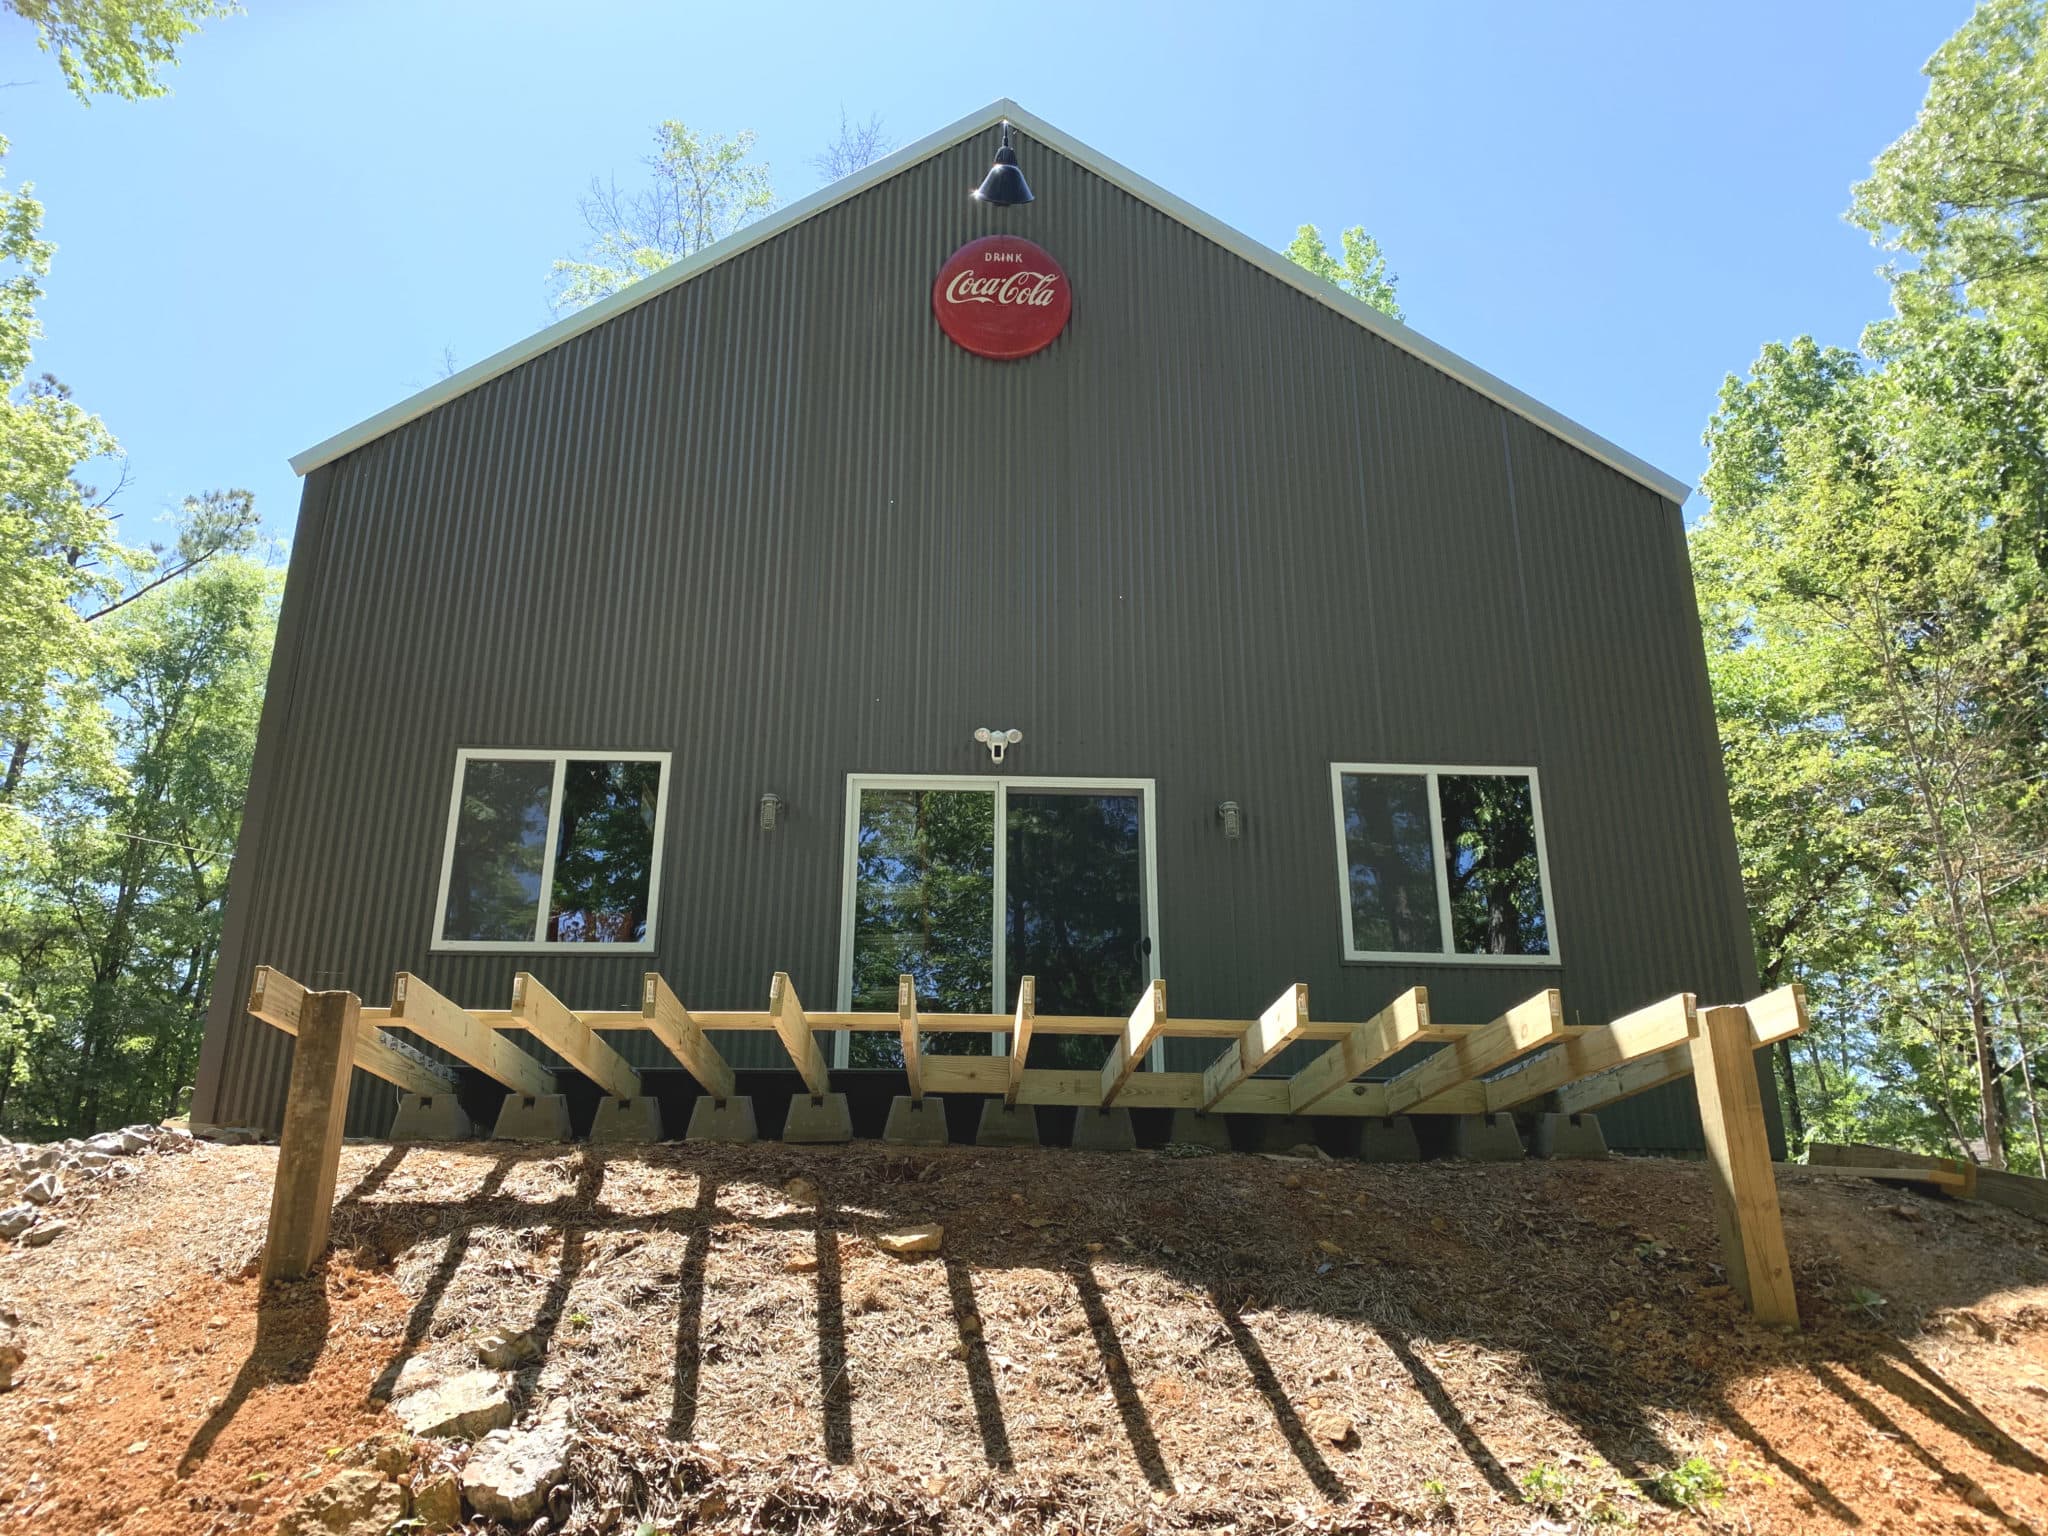
The lay of the land meant the deck would connect to the building at ground level beneath a sliding patio door. The deck would extend across a downhill slope to be supported by a beam and posts on the opposite end. Once built, the deck floor would be completed with railing and a roof structure attached the building, which will help protect it from rain, tree debris, and UV rays.
The deck was framed with treated lumber rated for ground contact, and constructed as a simple 11-by-16-ft. rectangle with joists on 16″ centers mounted to the ledger board with metal hangers.
A couple of standout features made this DIY deck project a quick and easy success. After framing the deck with quality materials, Joey wanted a long-lasting, low-maintenance deck surface. He chose the new Elevate brand capped wood-composite deck boards from MoistureShield.
Elevate decking brings some key advantages, offering homeowners the benefits of composites – such as good looks with no splinters and low upkeep – at a cost of only 15 percent more than a wood deck. MoistureShield accomplishes this in part with the design of the deck boards. The “scalloped” shape of the board conserves material while still maintaining strength and rigidity. This design also results in a lighter board when compared to typical 5/4 composites, so a single installer can easily lift and maneuver full 16-ft. boards without a problem.
And damp locations are no issue for Elevate decking. The boards feature MoistureShield’s Solid Core proprietary manufacturing process to protect against moisture absorption, warping, rotting, and damage from insects. Reportedly, this technology has resulted in zero structural field failures, whether the boards are in the ground, on the ground, or even underwater.
To install the deck boards, Joey used CAMO Edge Clip fasteners from National Nail. The Edge Clips are designed to speed up installation for any type of grooved decking, including wood, capstock or PVC. The clips align over the joists with tabs that insert into the grooves of the adjoining deck boards. Use CAMO’s small plastic Never-Miss Guide to hold each deck screw while you easily drive the clips into place.
After finishing the deck frame the previous day, Joey completed the deck-board installation over the course of a morning. The result is a nice, new living space to hang out and relax. By using full 16-ft. deck boards, the surface has a sleek unbroken appearance with no end joints, and the CAMO system ensures no visible fasteners for a neat, clean look. The project also came together much faster than when employing more conventional deck-installation methods.
Joey’s man-cave has now reached a new level.
Construction Steps
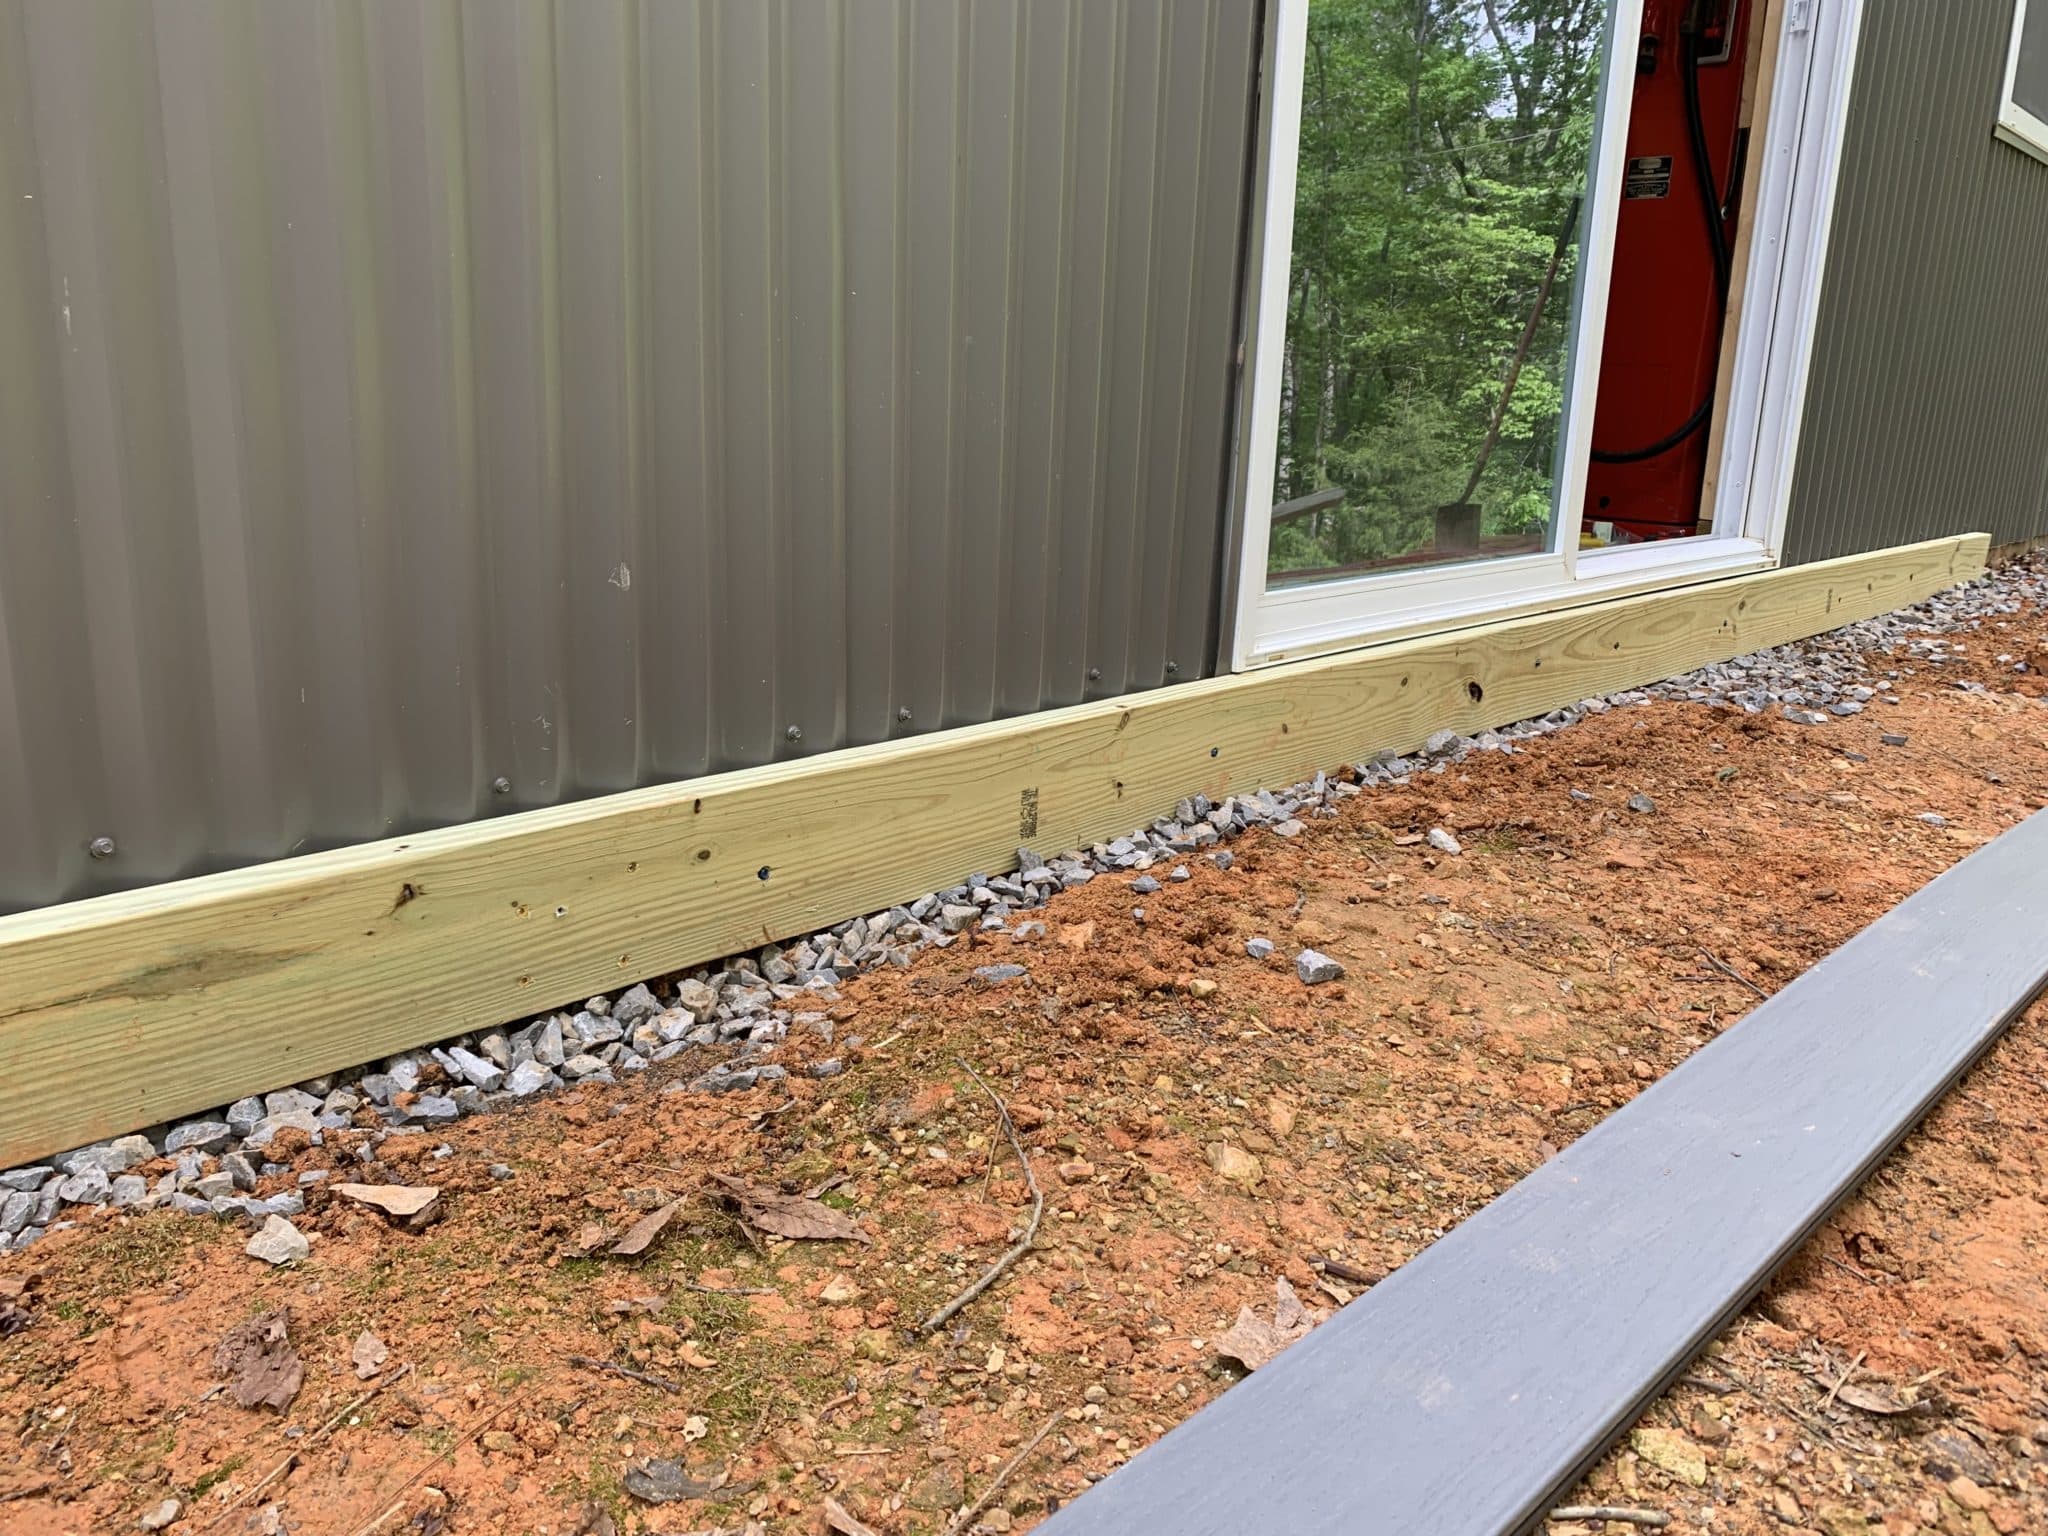
The ledger board of the deck is lagged into the structure at ground level. The ledger and deck will be protected from rain by a roof, and as an extra precaution, the ledger rests on a trough of drainage rock to help channel away any ground-level water.
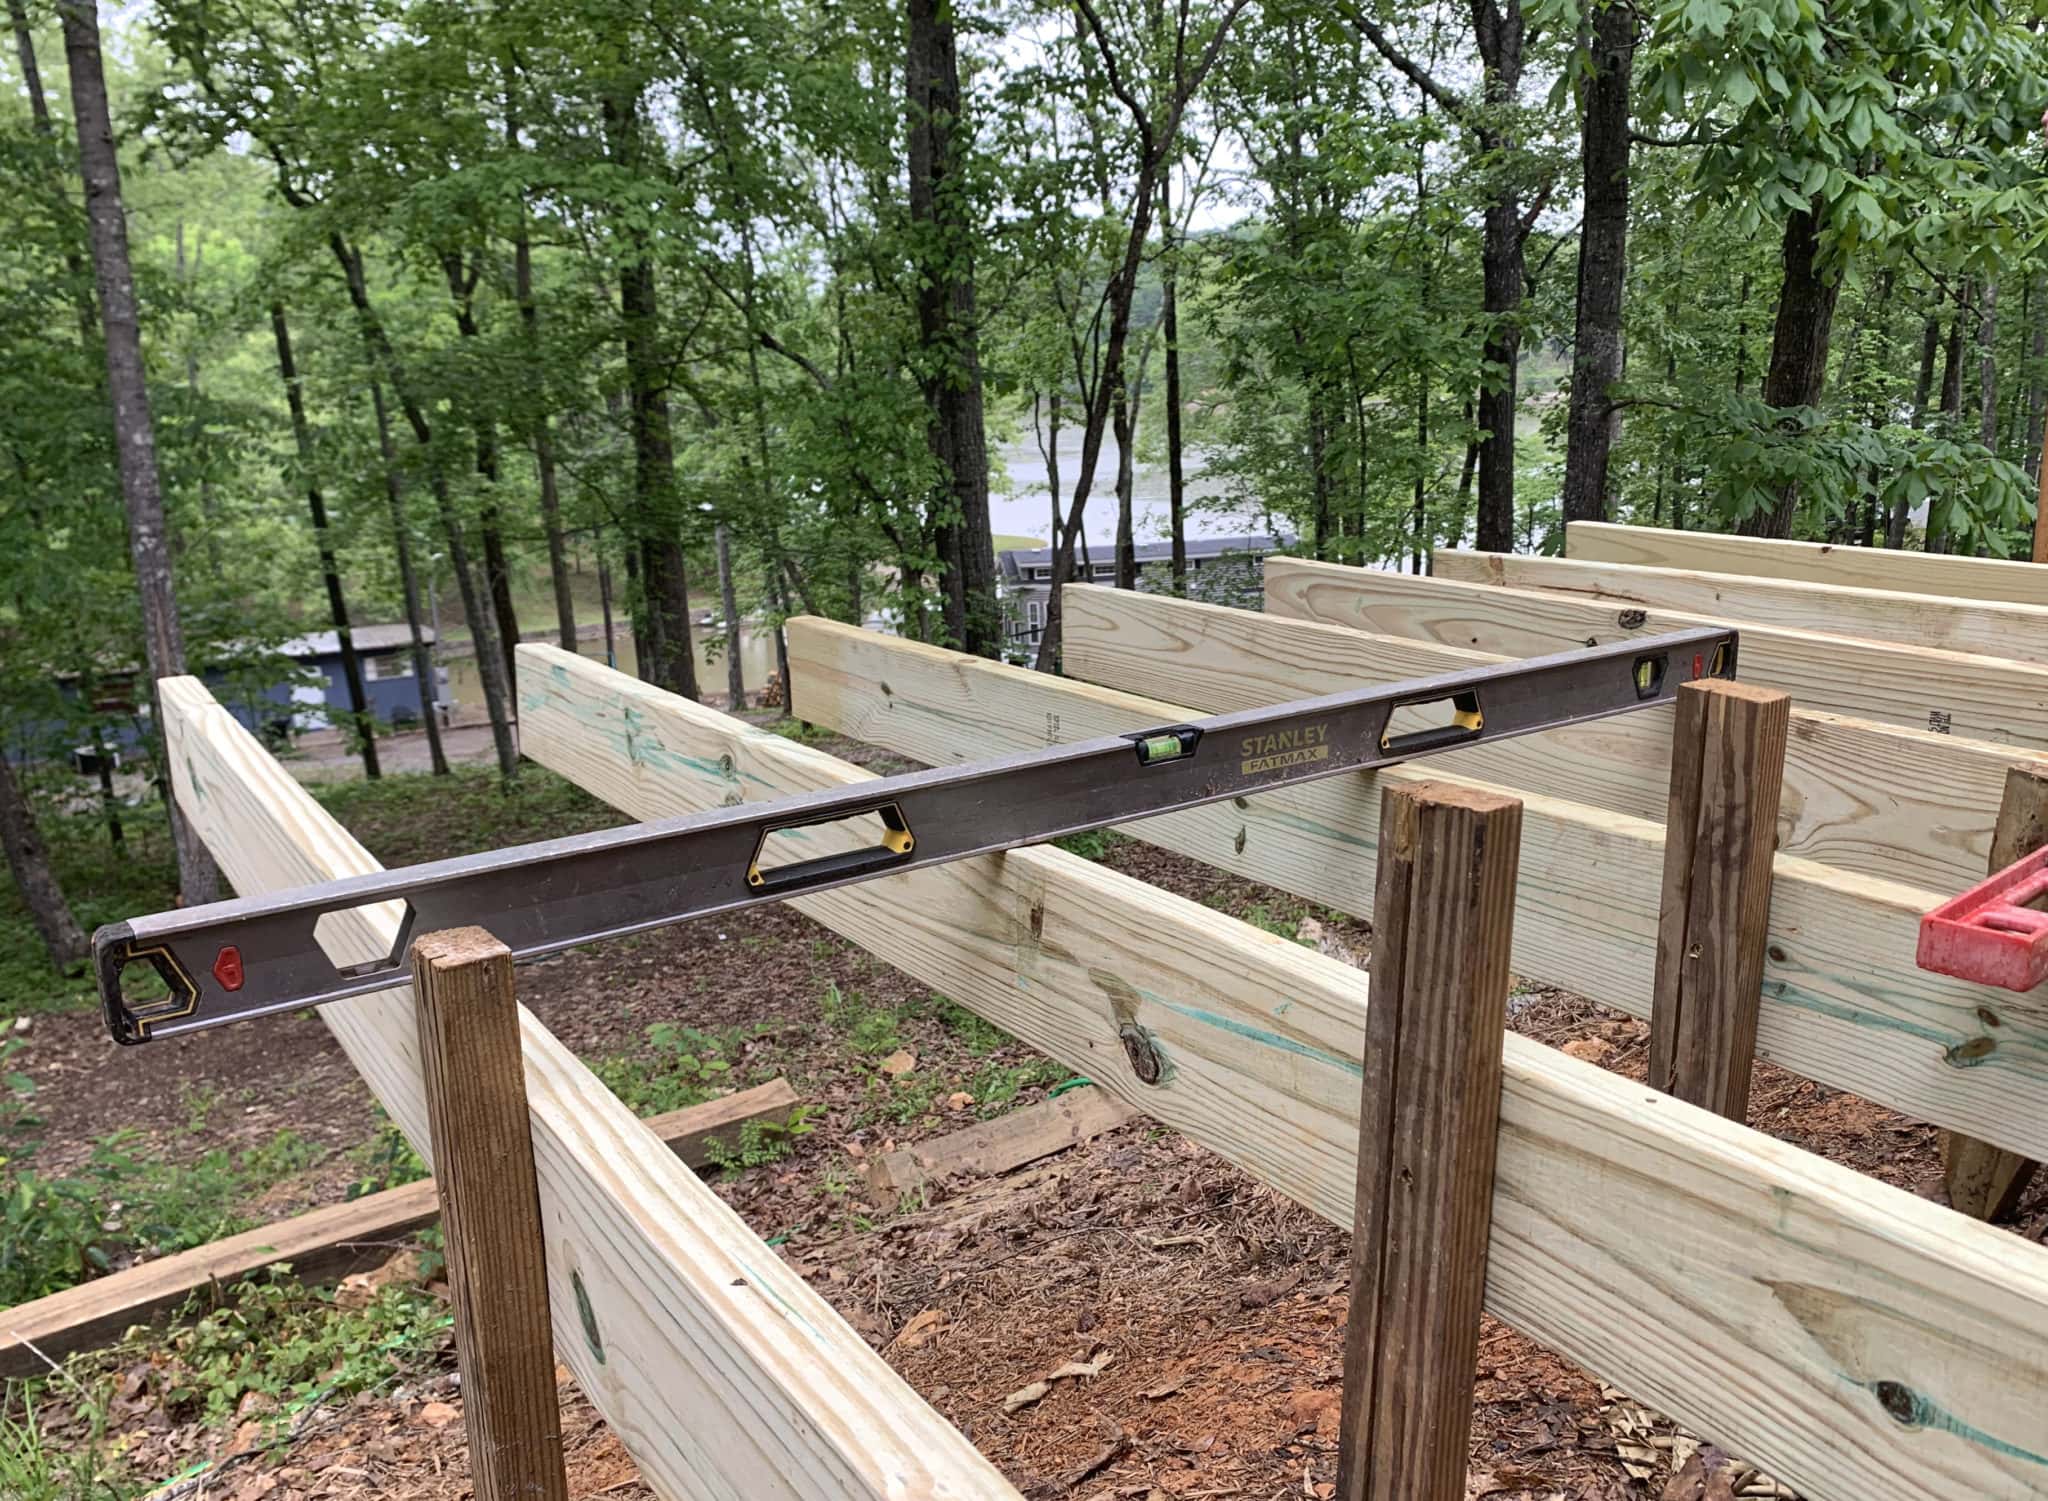
Use temporary support braces to help position the joists.
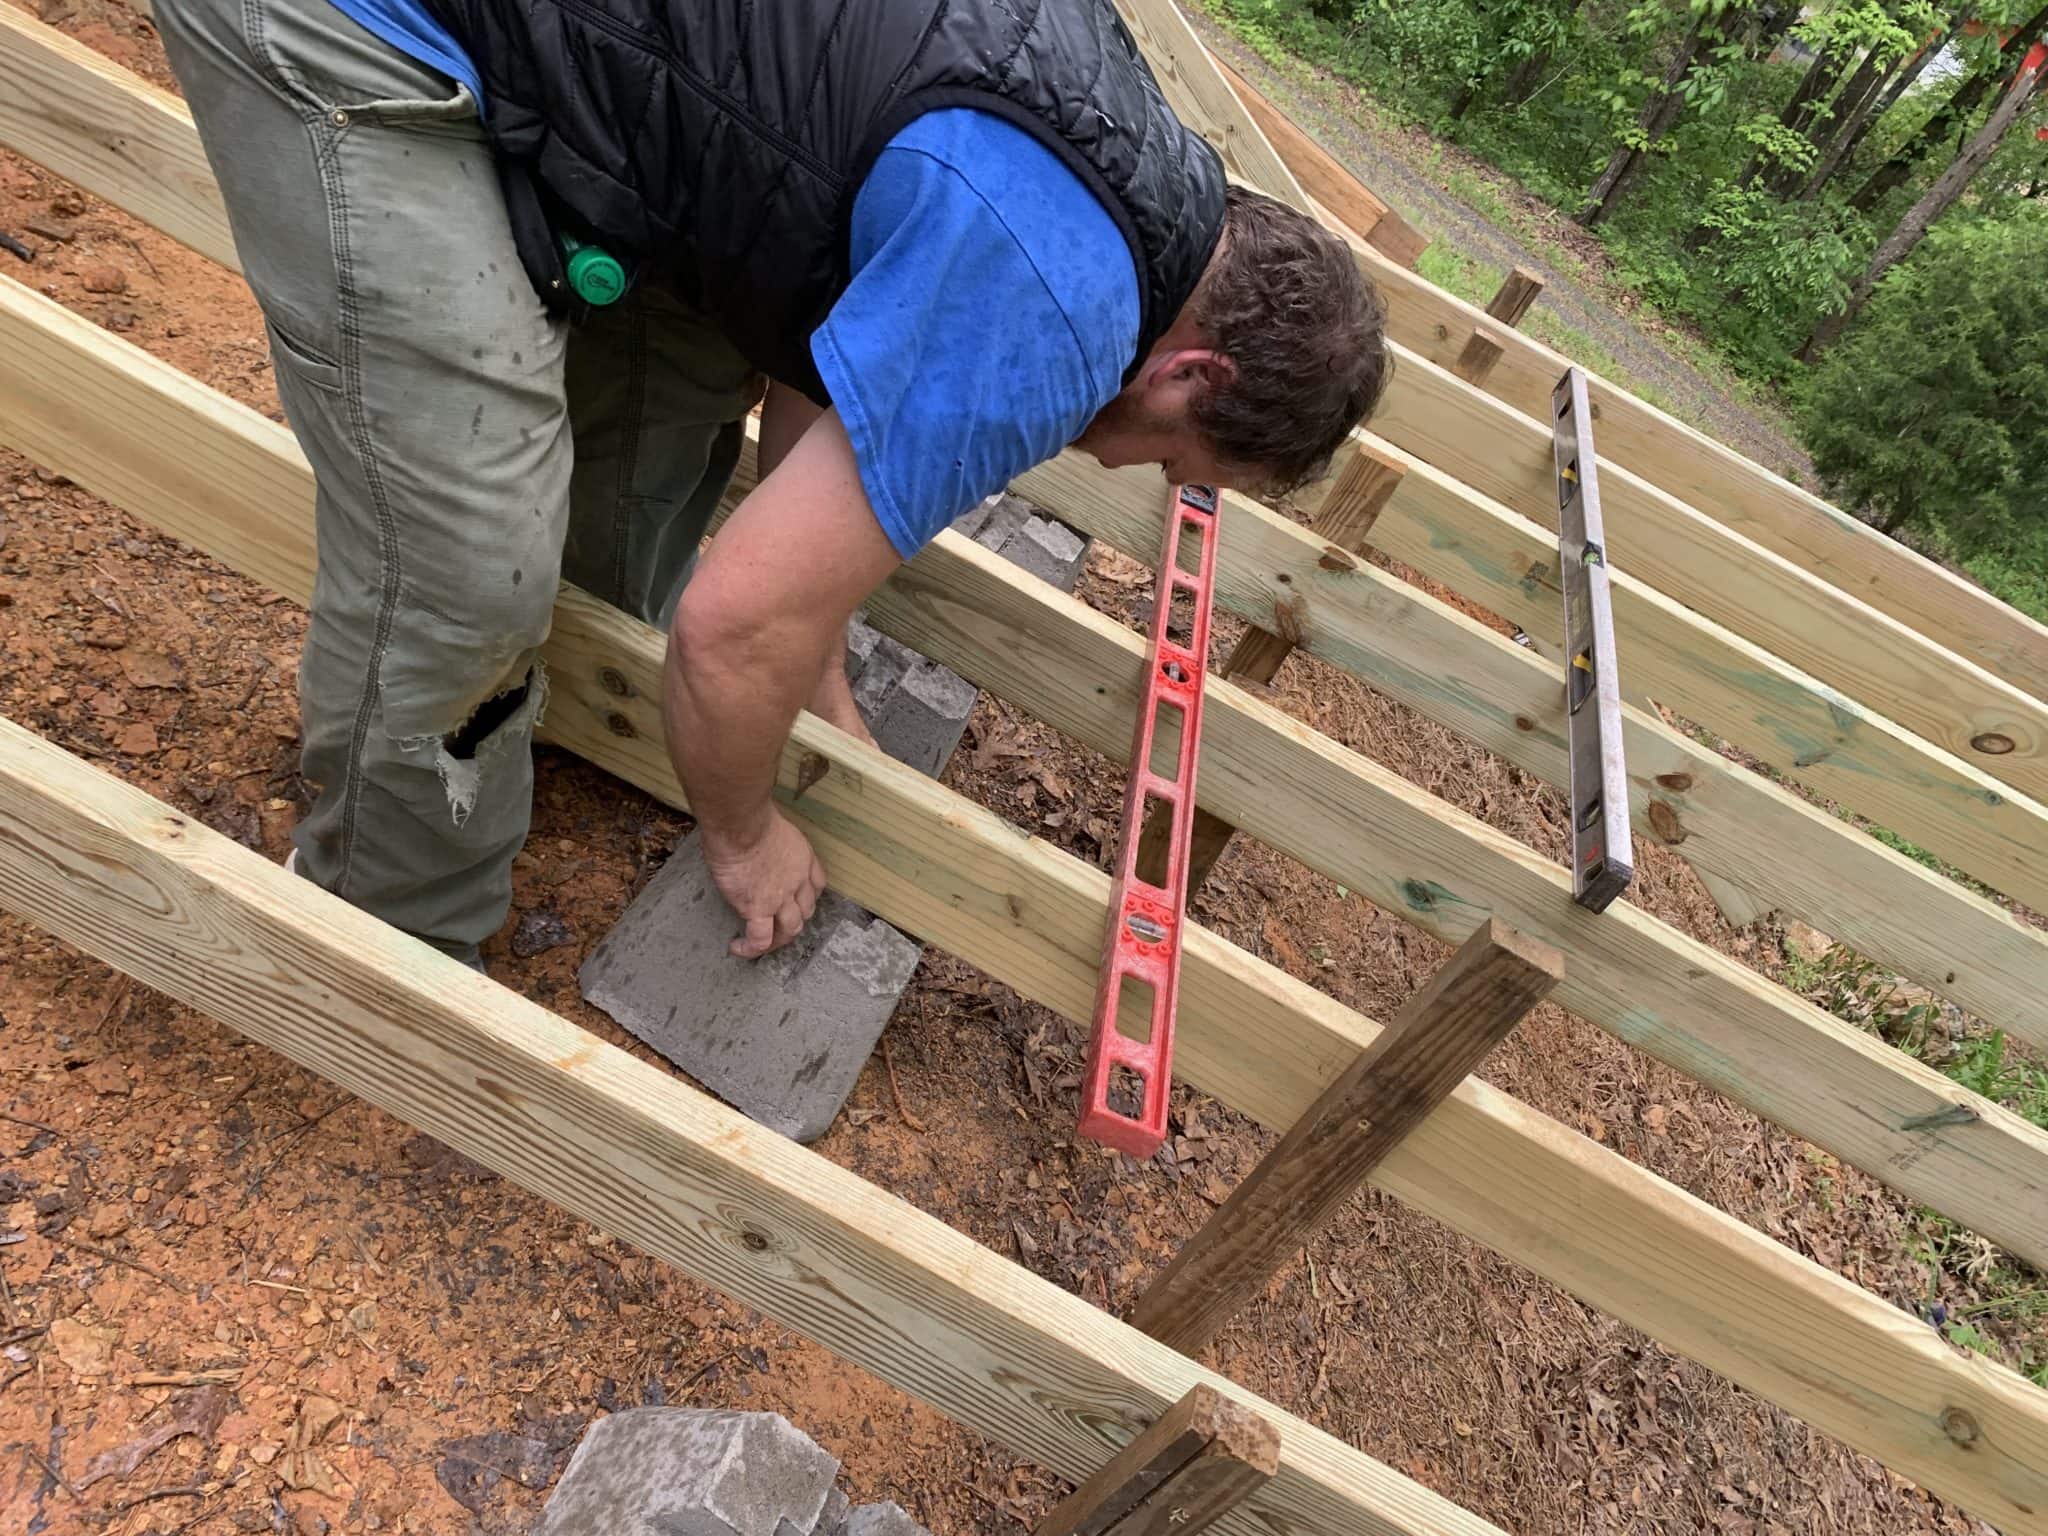
Joey Prestage uses deck blocks to support the joists near the middle of the span.
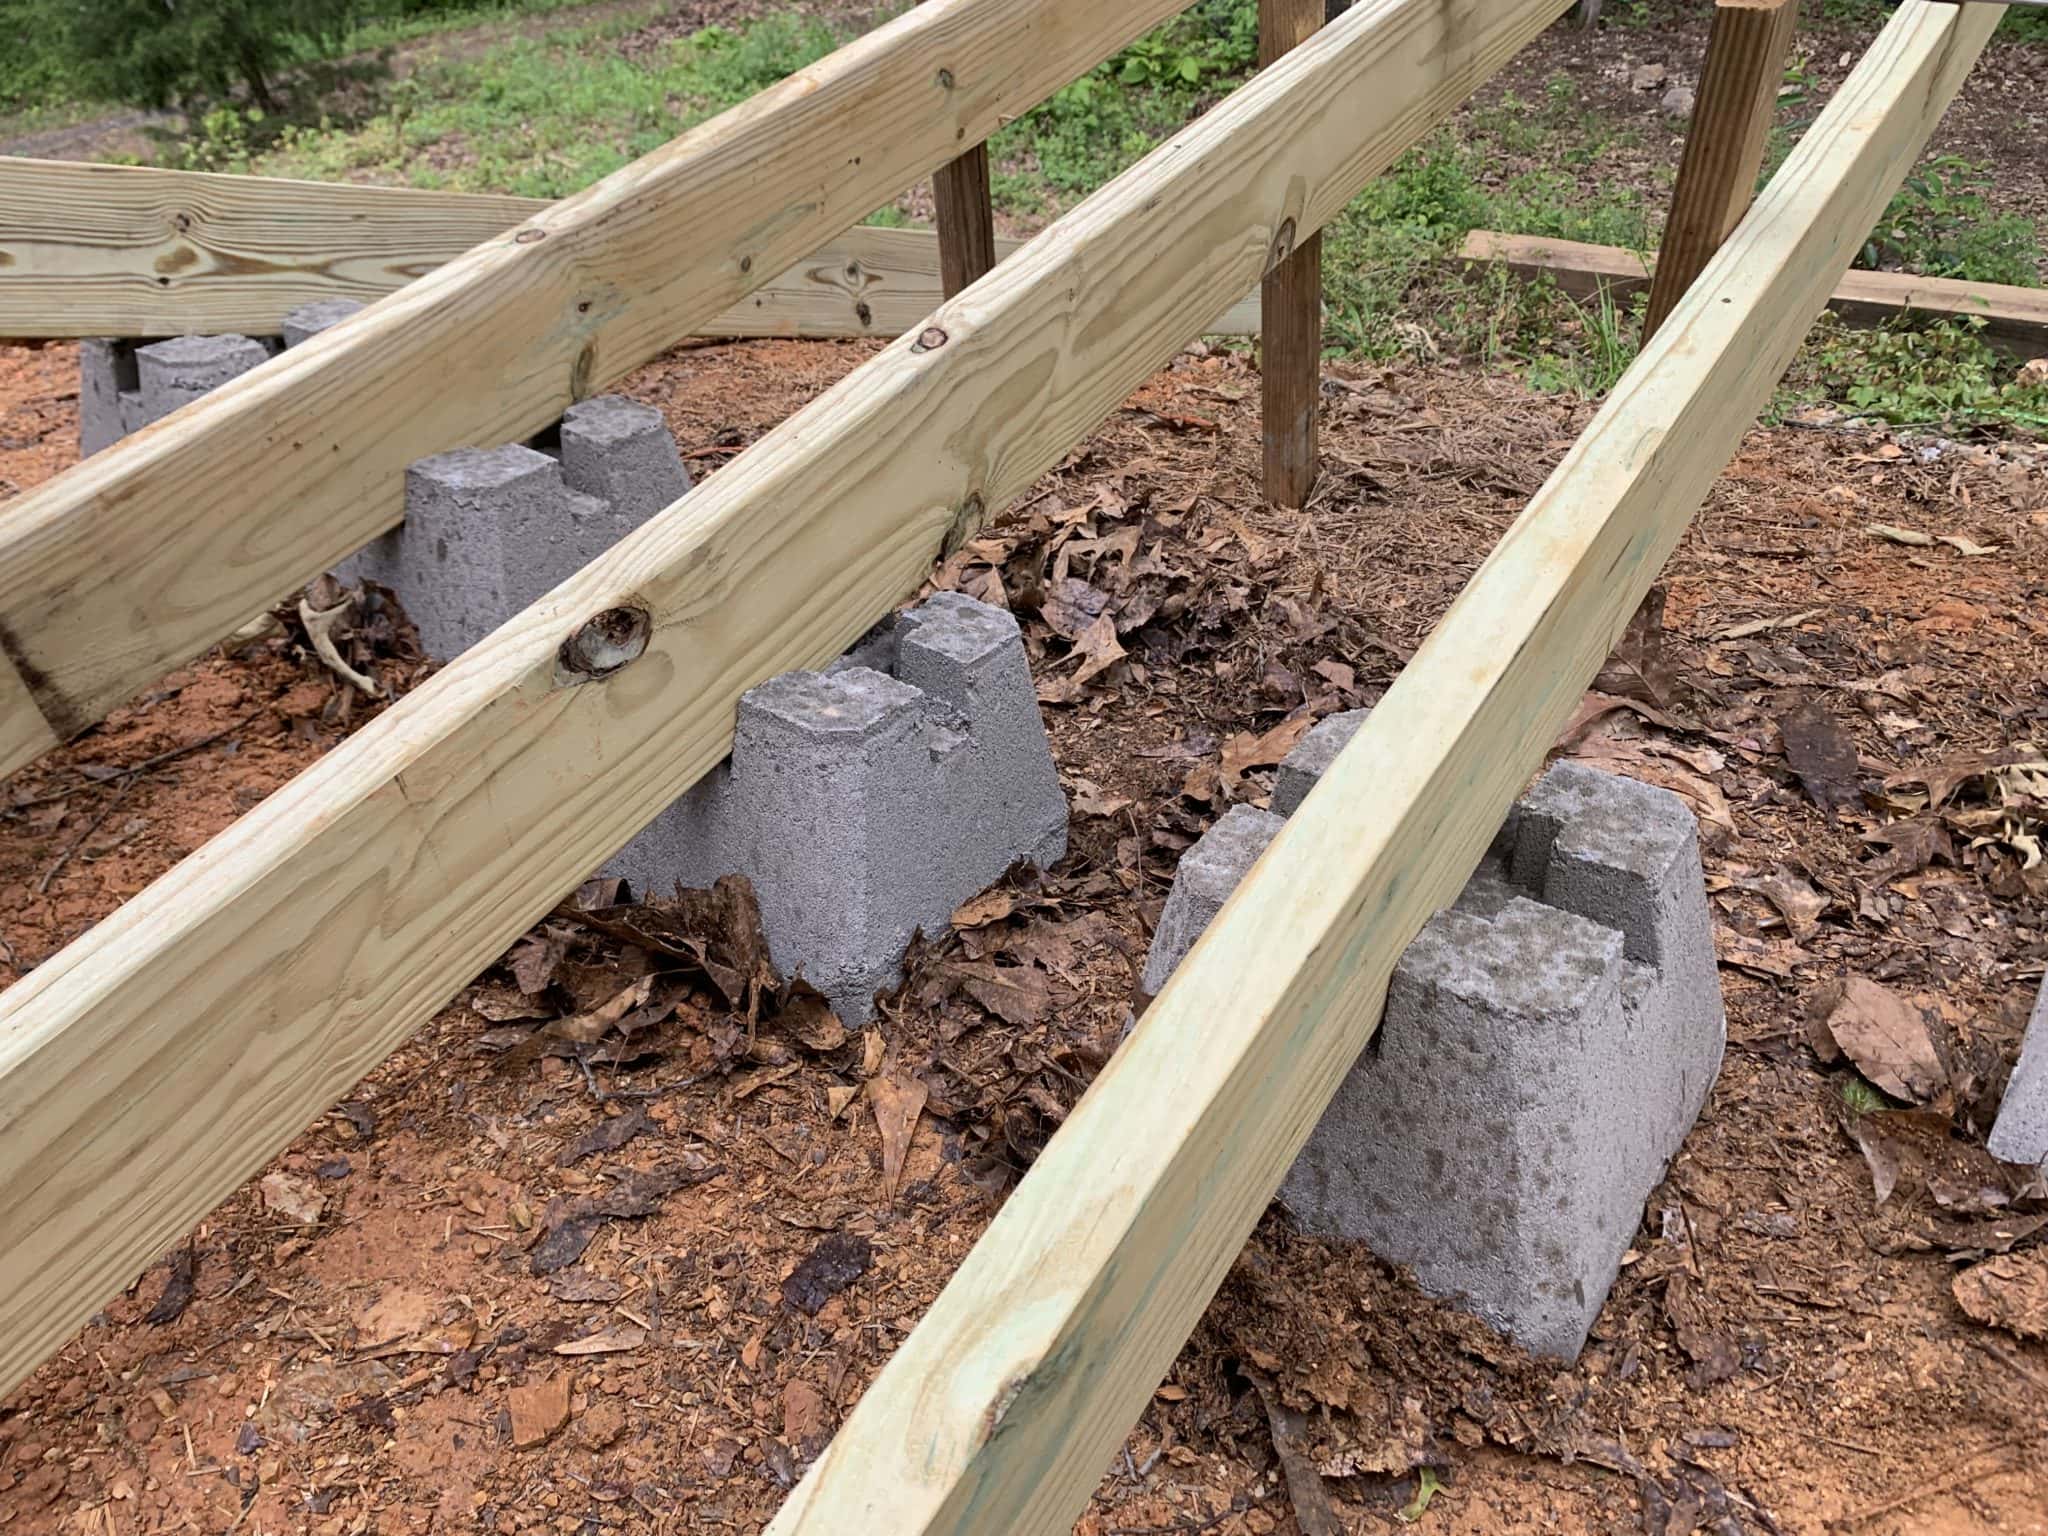
Available at most home centers, deck blocks are pre-cast concrete piers with slots formed into the top to fit 2x lumber.
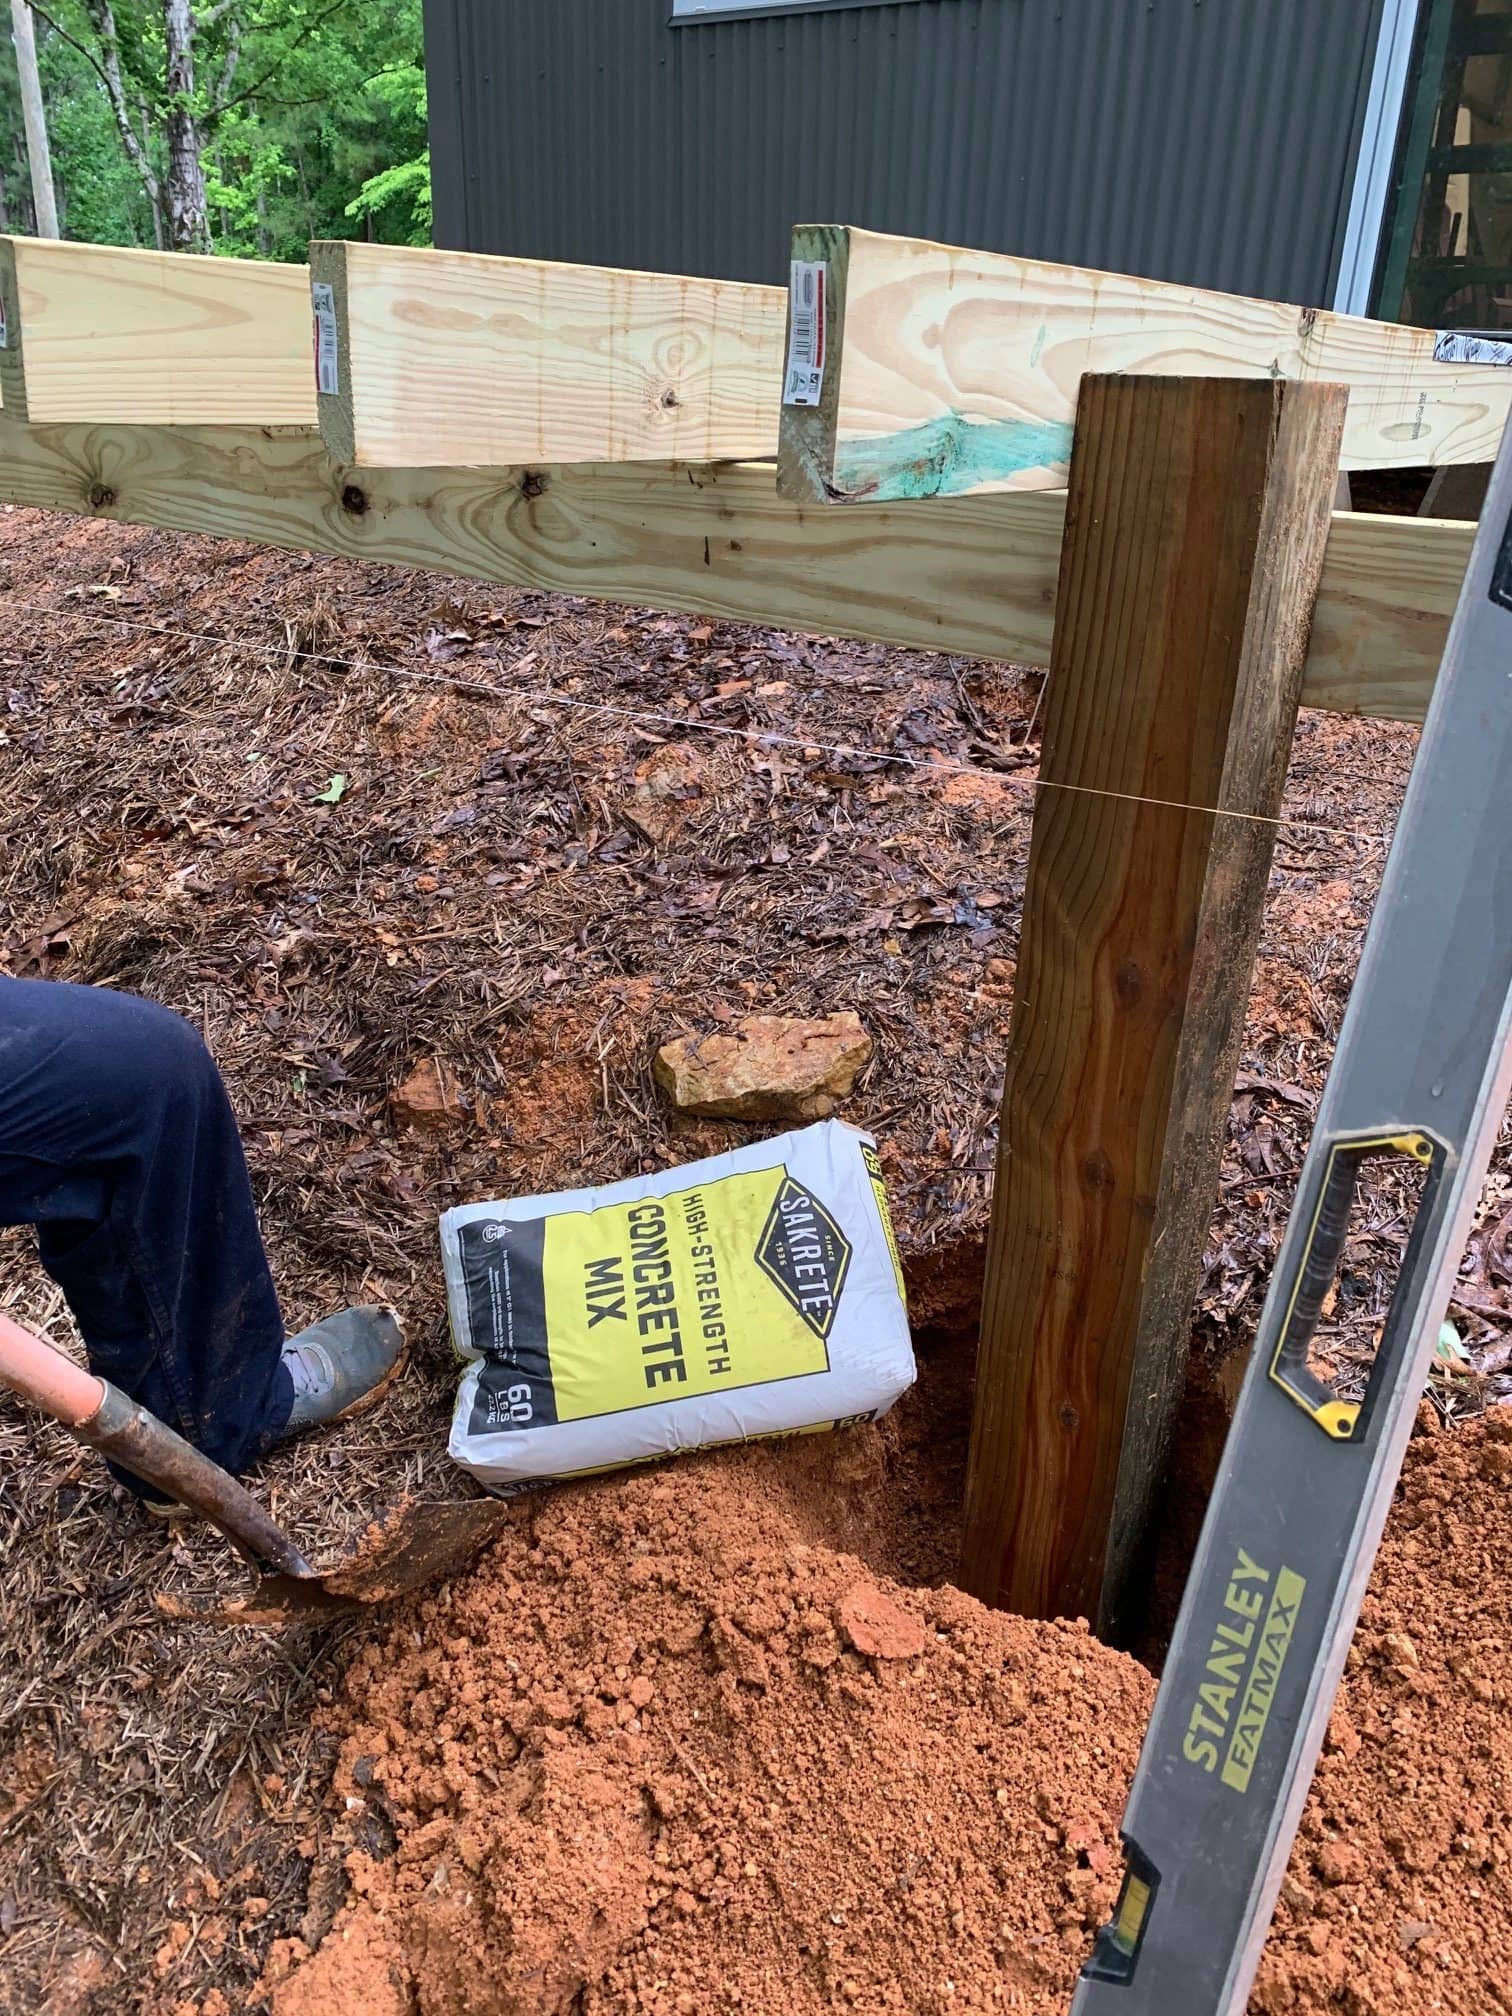
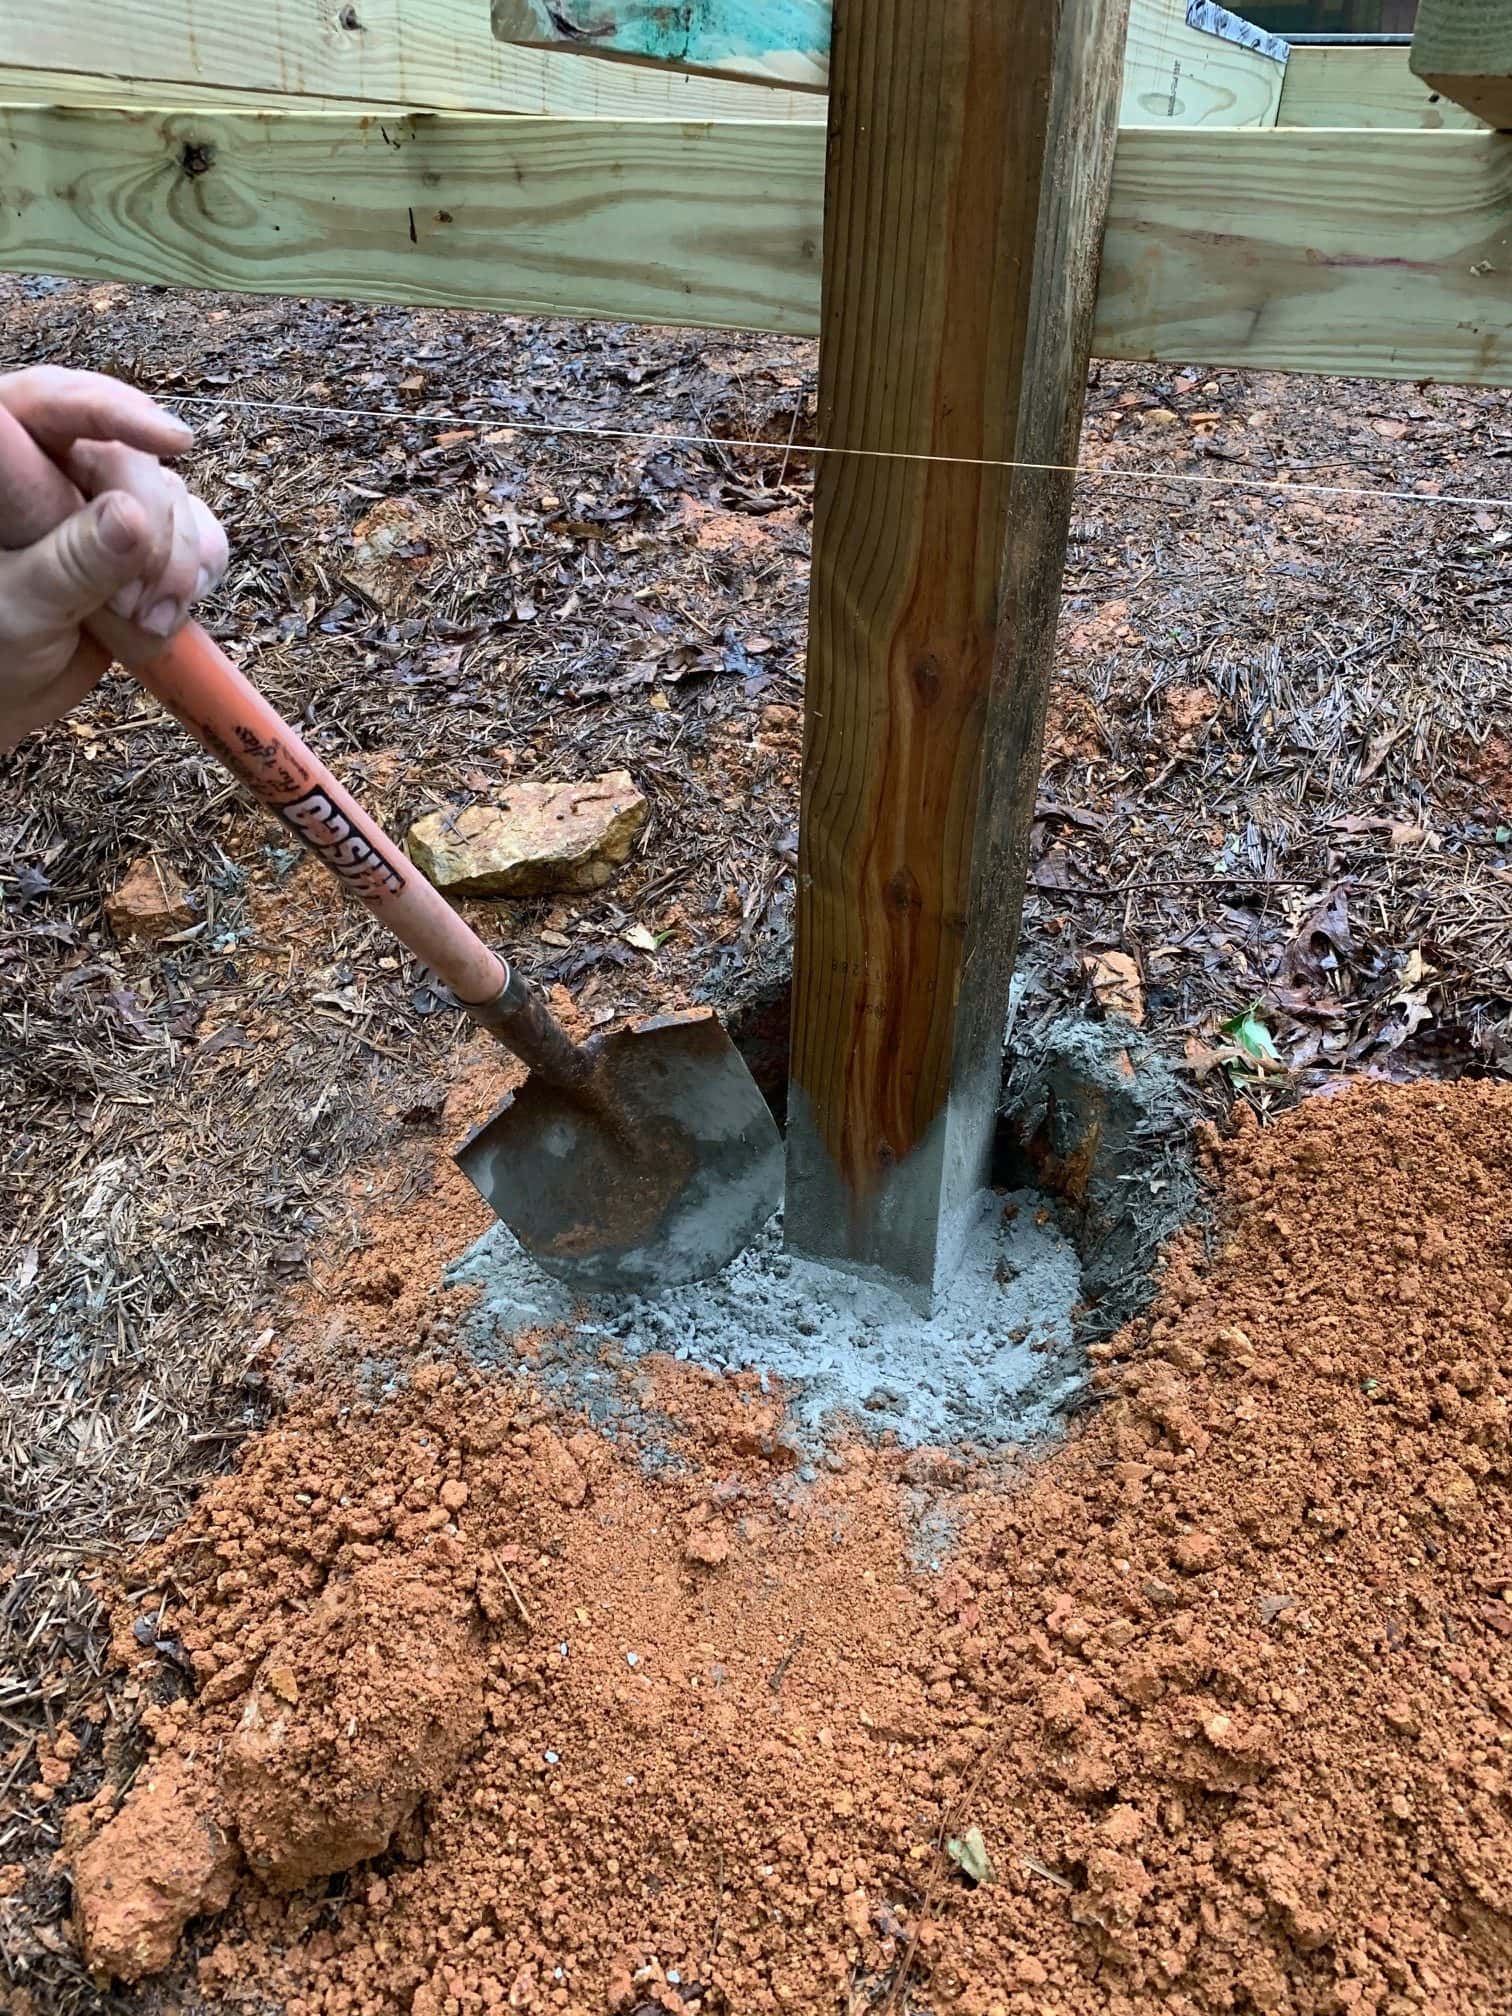
The 6×6 posts that support the deck beam were each set in footings made from Sakrete high-strength concrete.
Orient all joist crowns toward the top, and make sure they remain level with a flush surface to keep the composite decking even.
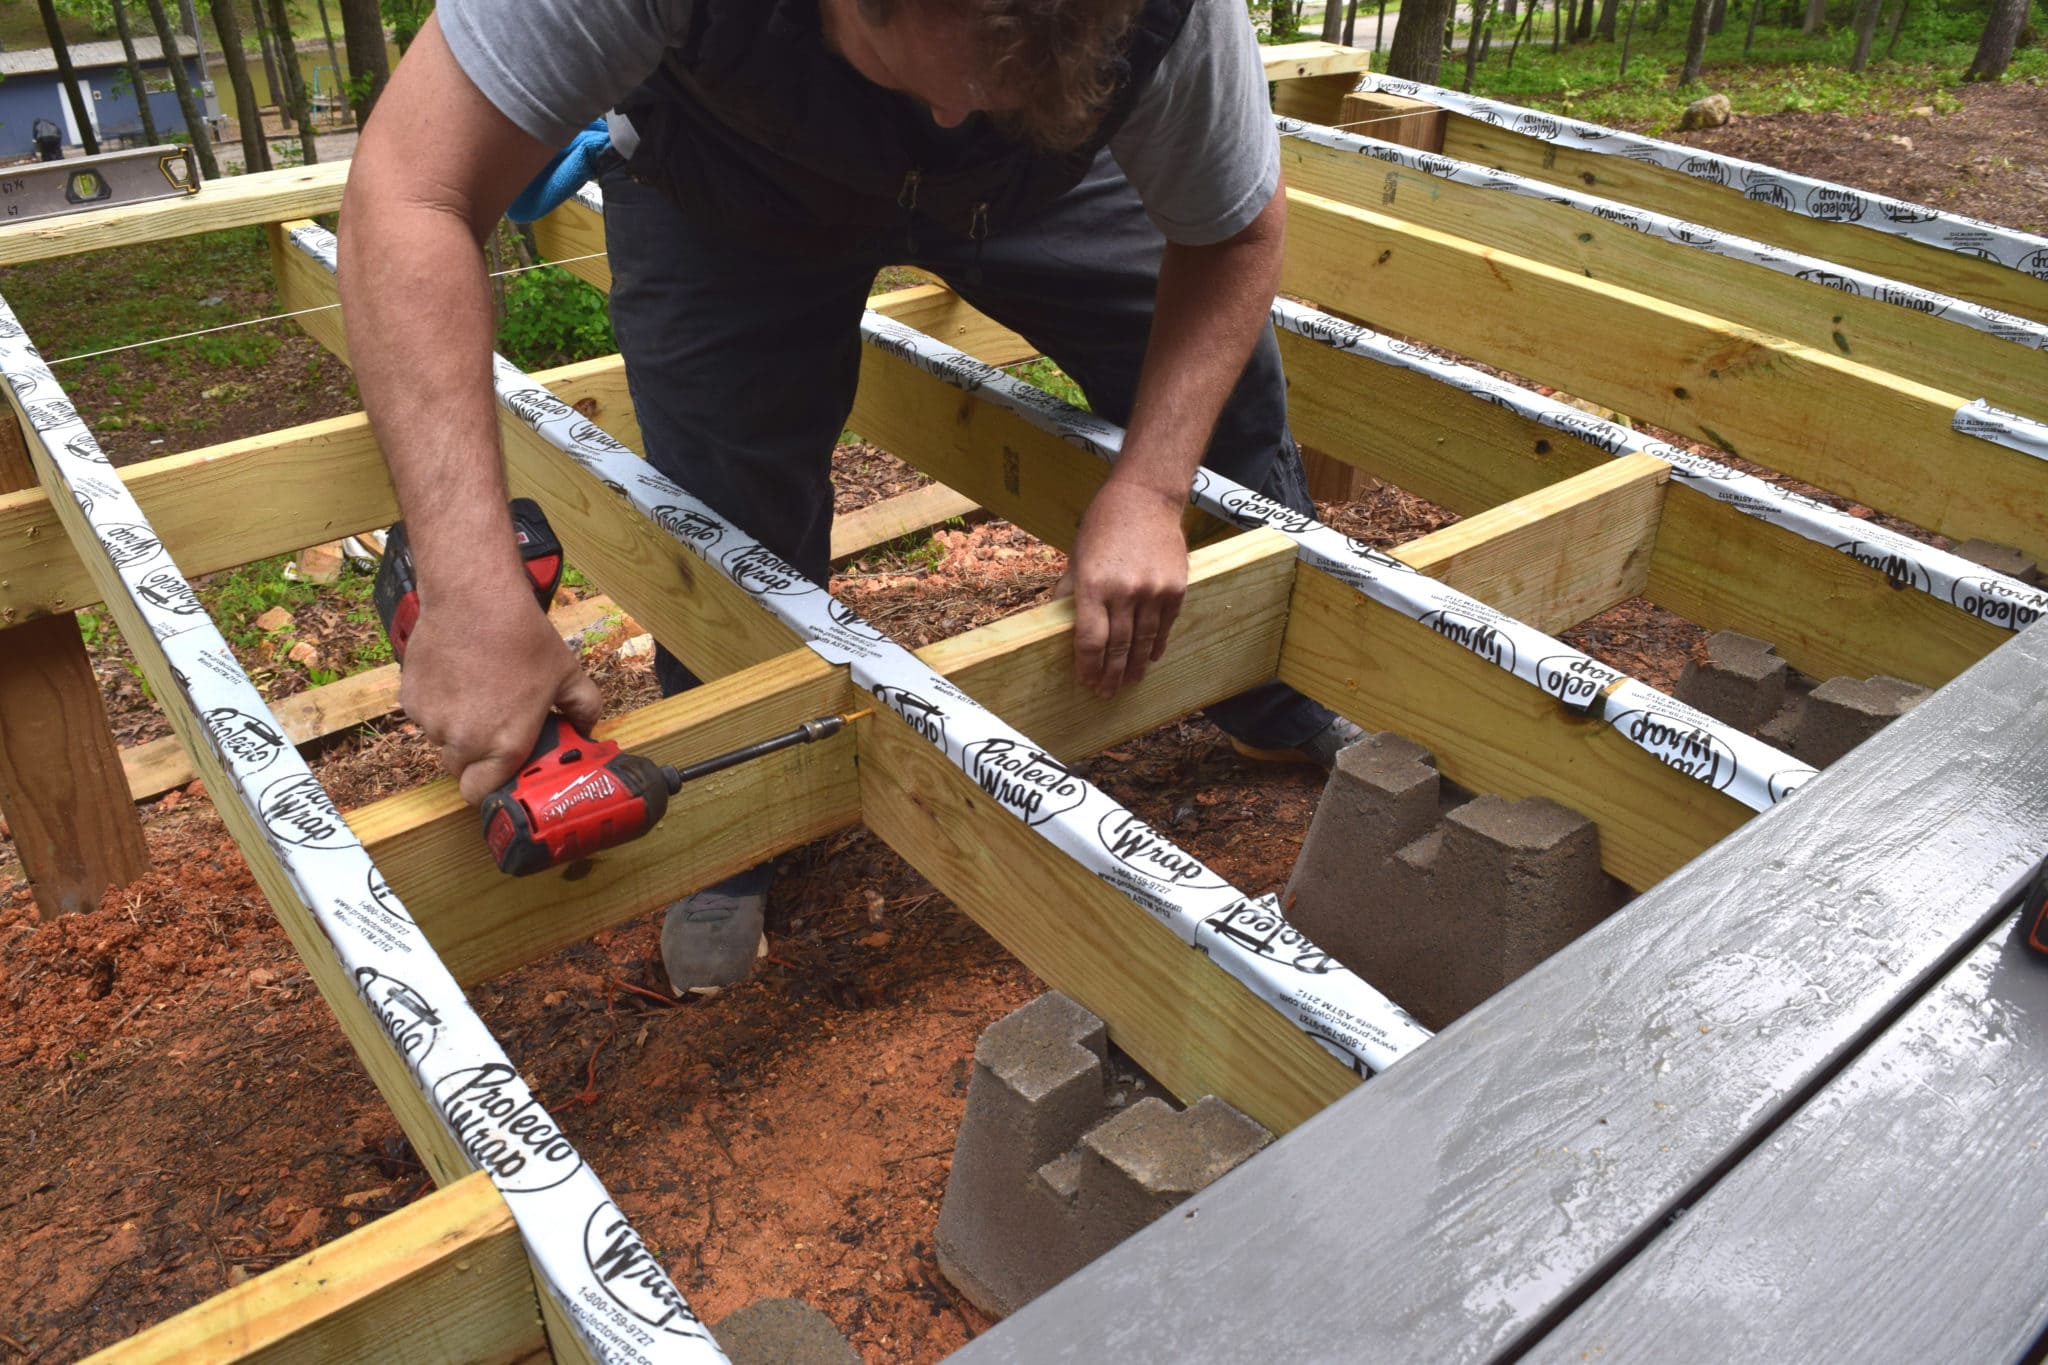
Add strength and rigidity to the frame by installing offset blocking between the joists.
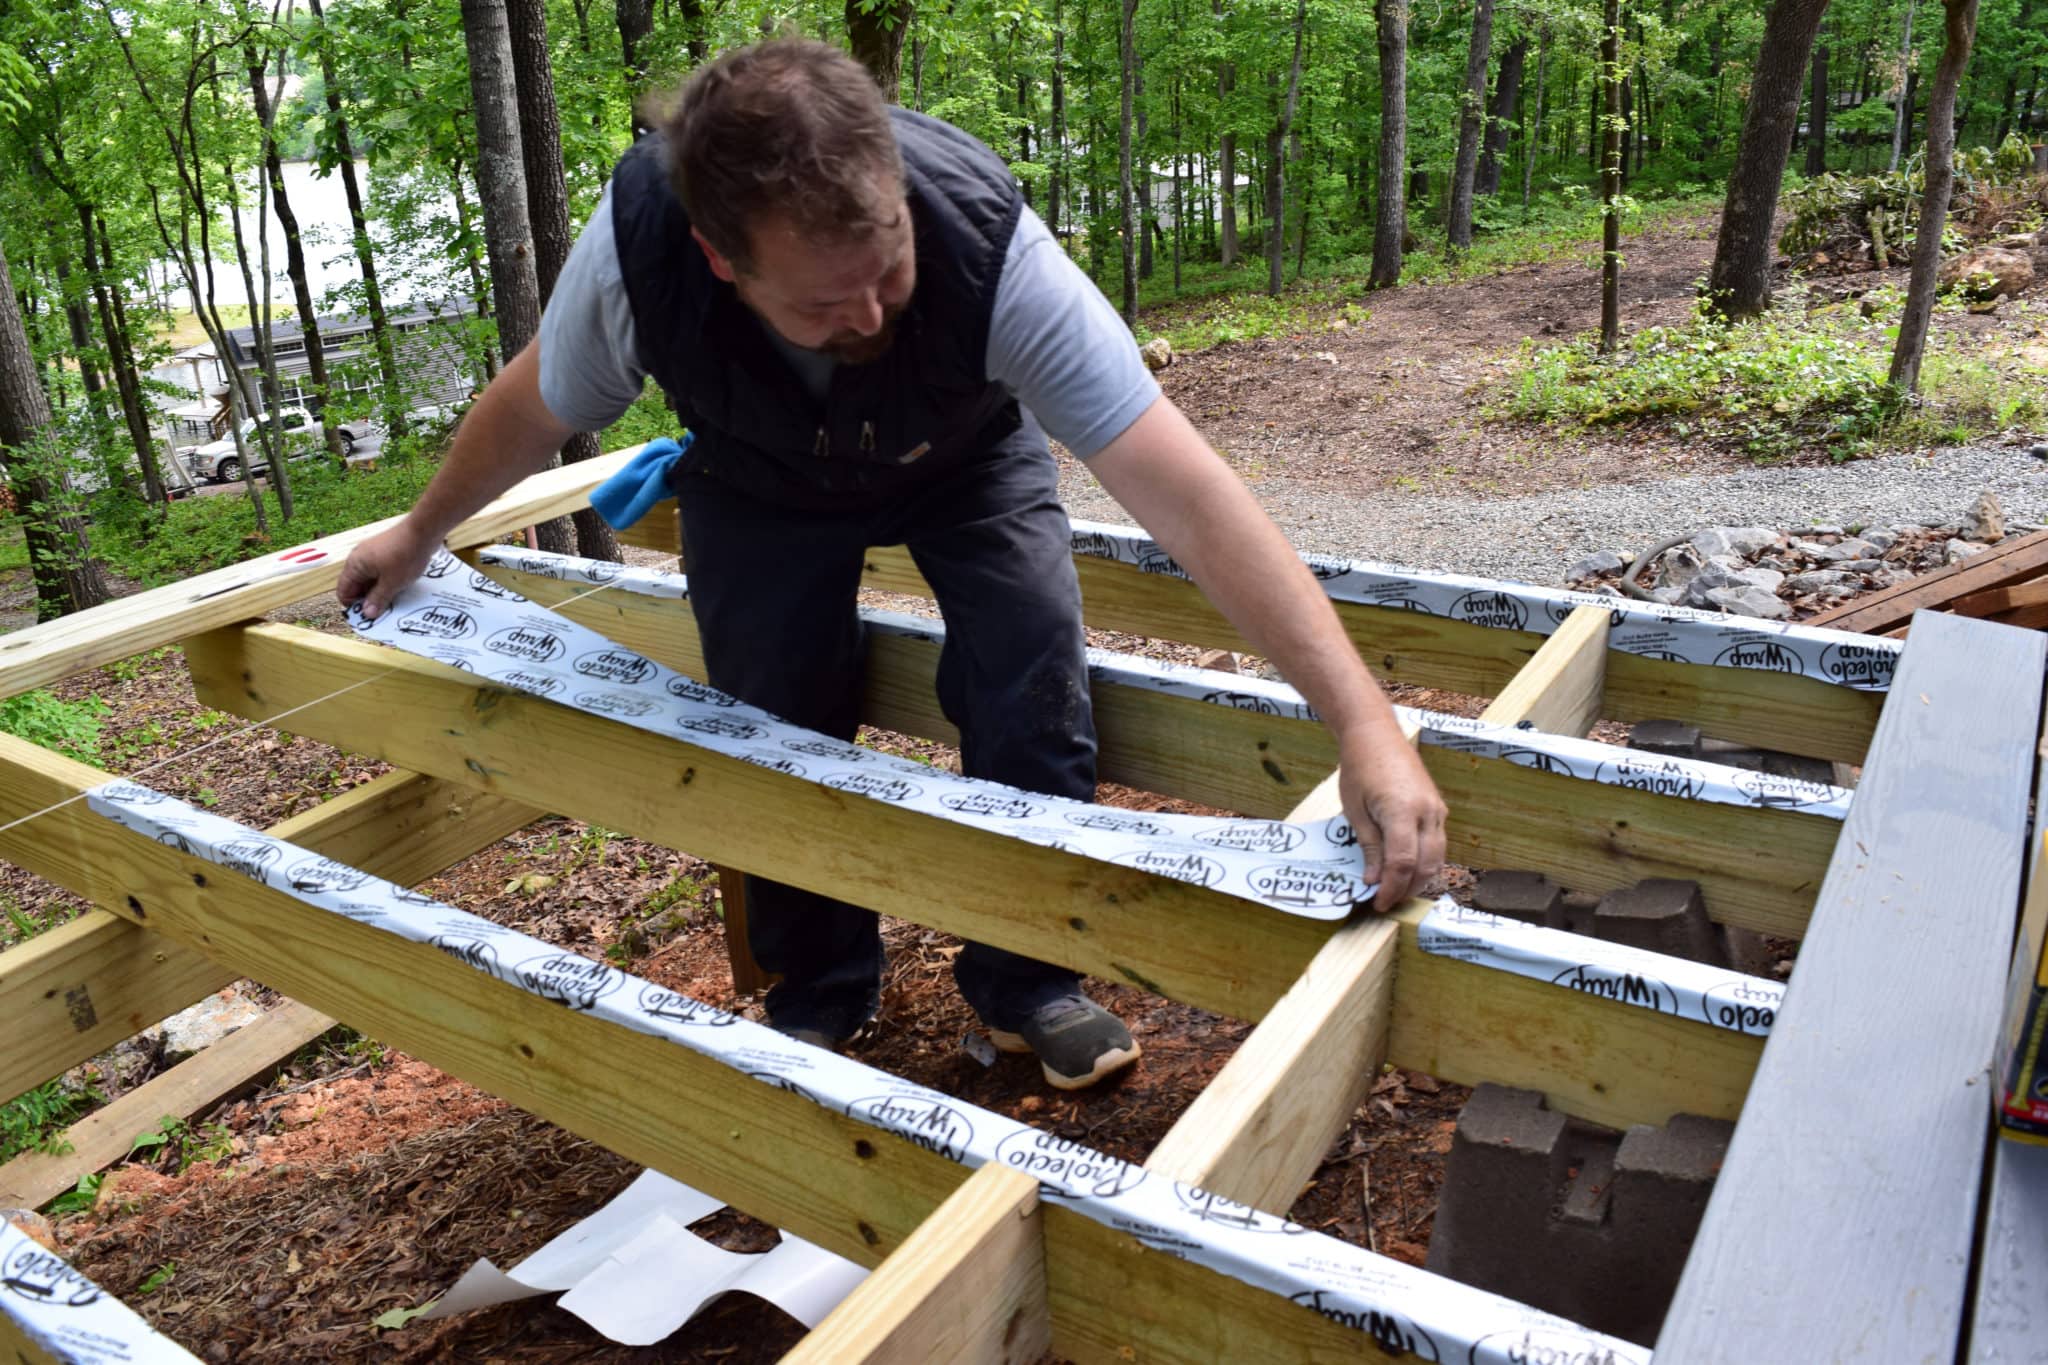
Protect the deck frame from water damage and rot by applying flashing tape to the top surface.
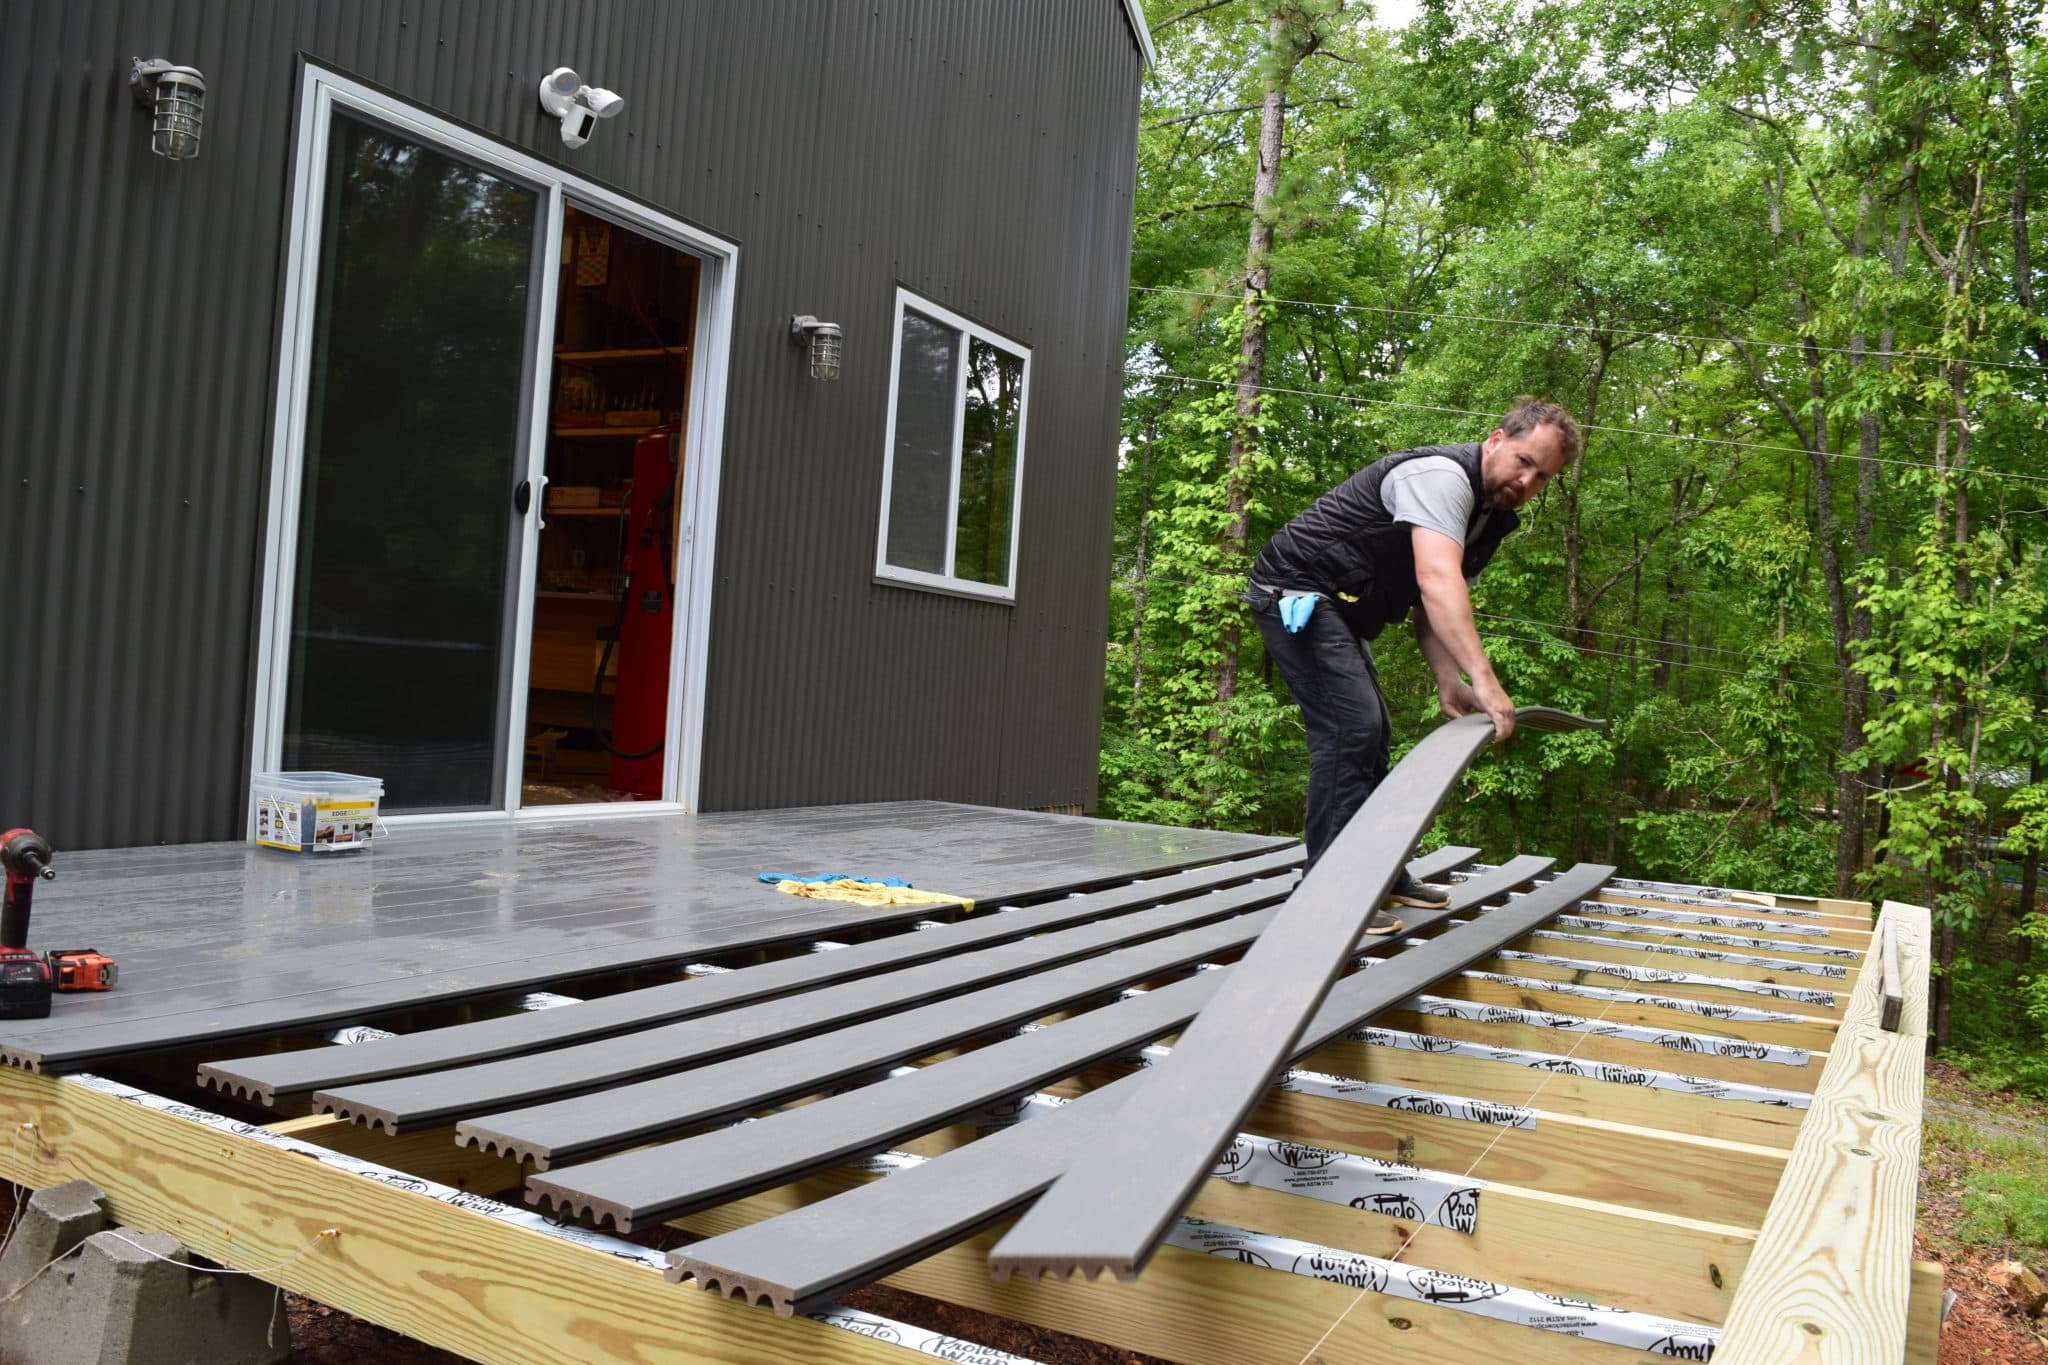
The lightweight MoistureShield Elevate capped composite decking makes it easy for a single installer to lift and maneuver 16′ boards.
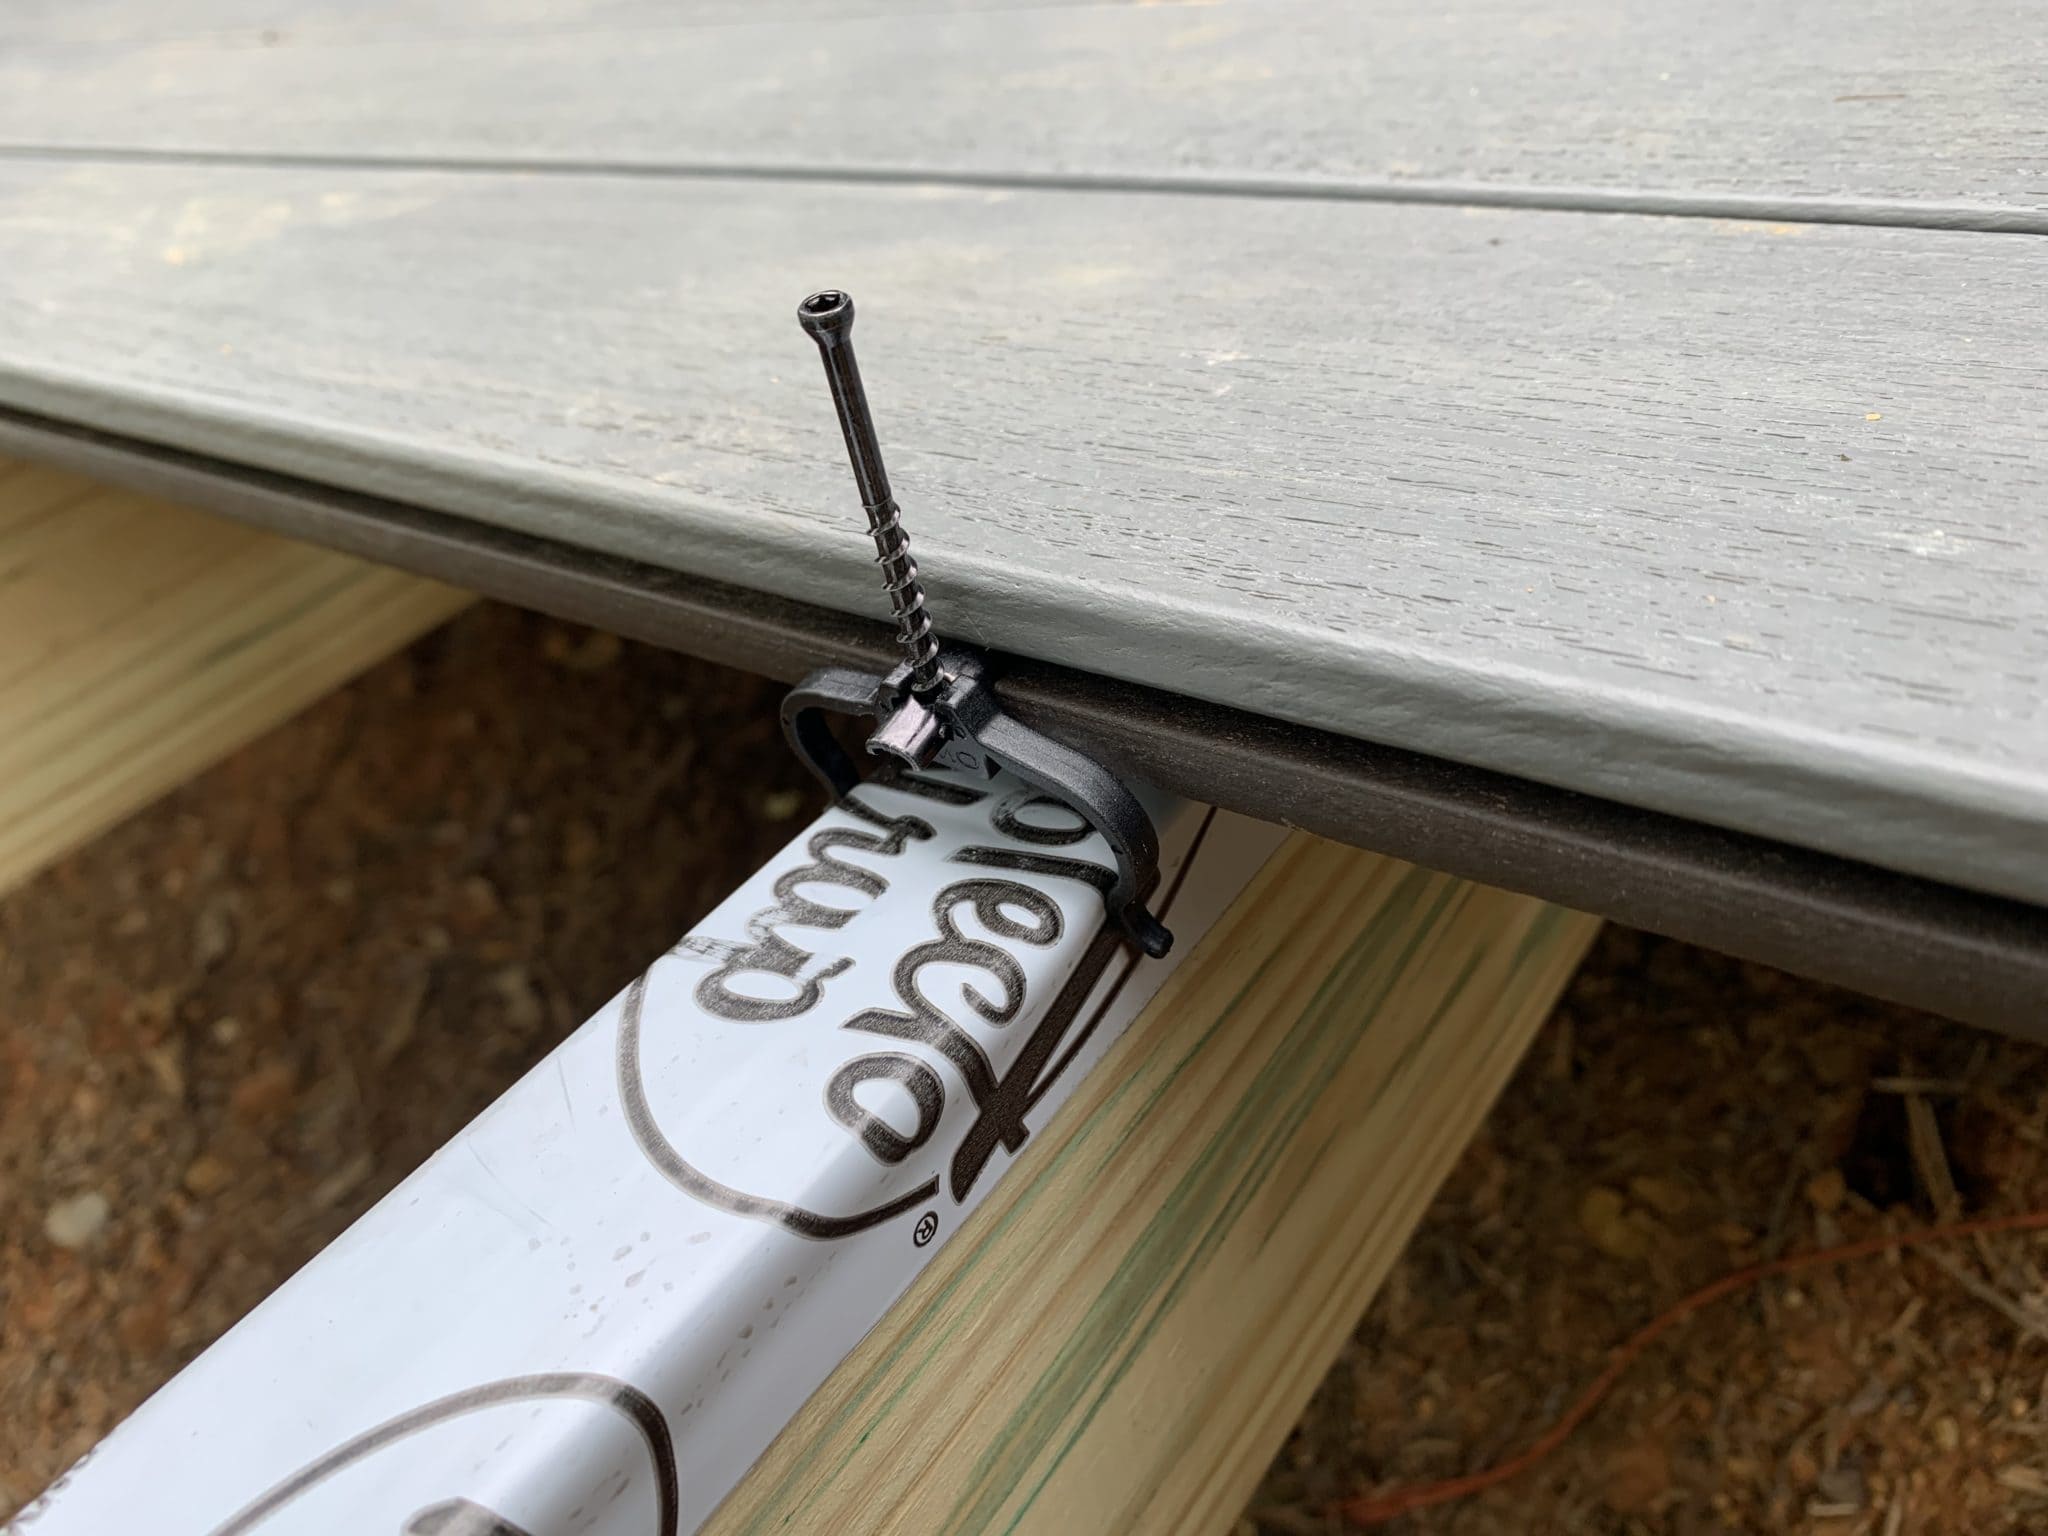
The decking was installed with CAMO Edge Clips, which have tabs that hook into grooved boards and clamp them onto the joists when the clip is screwed down.
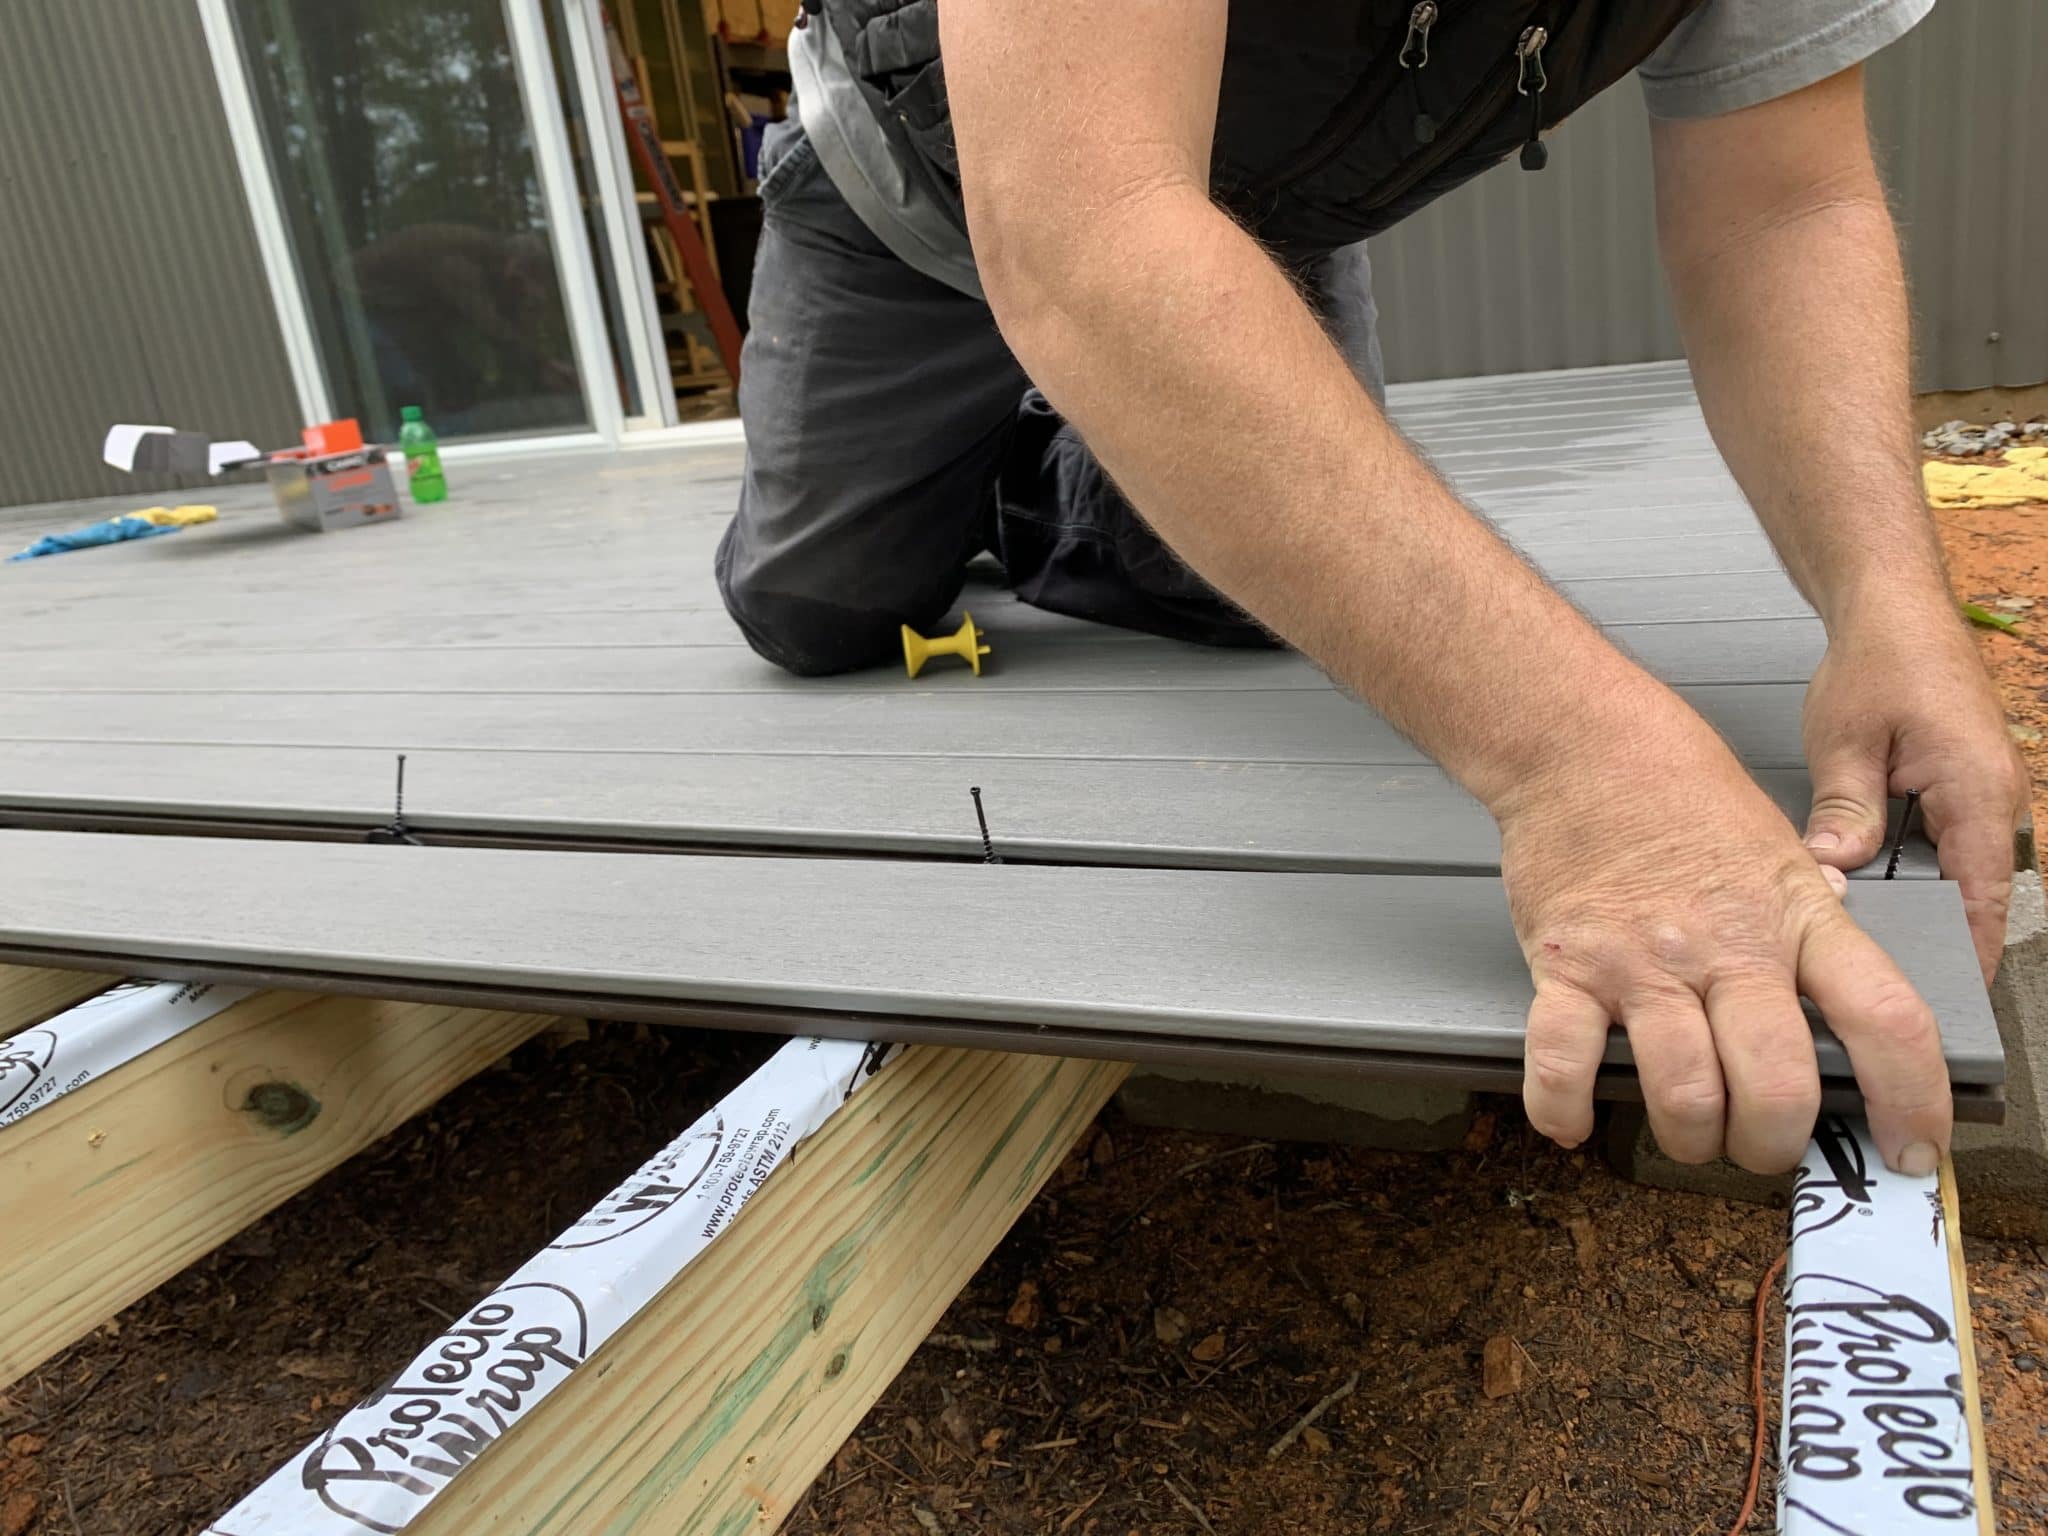
The next row of decking “sandwiches” the Edge Clips so the tabs bridge the grooves of the adjoining boards.
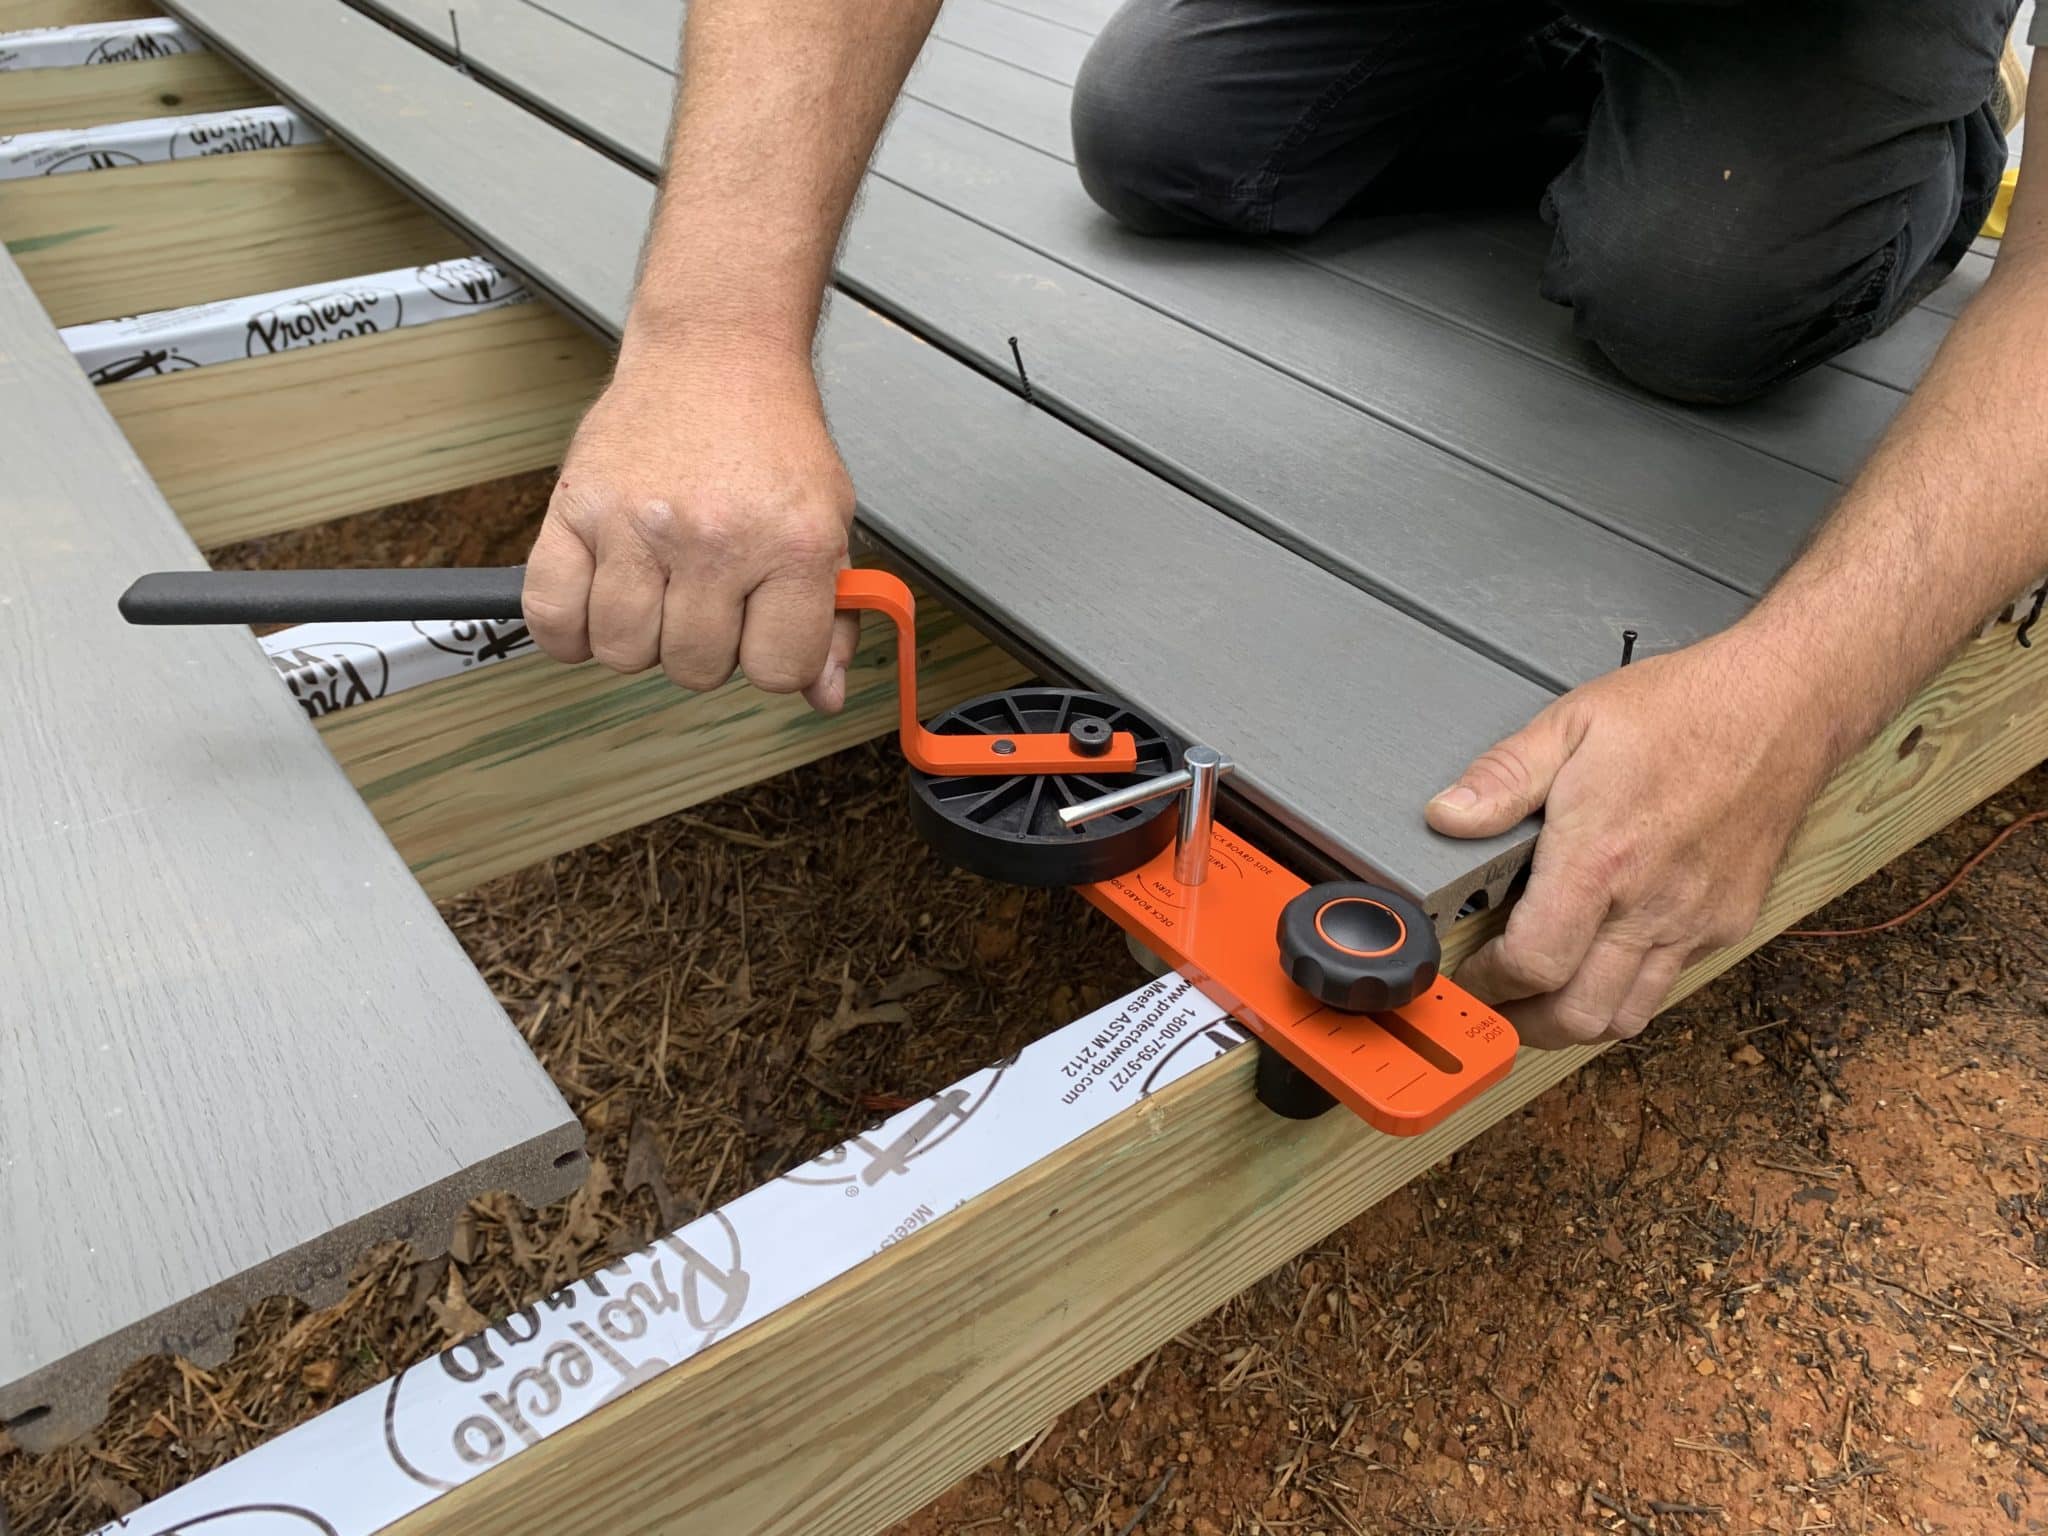
CAMO has a new installation tool called the LEVER, which is designed to push against deck boards and tighten the joints.
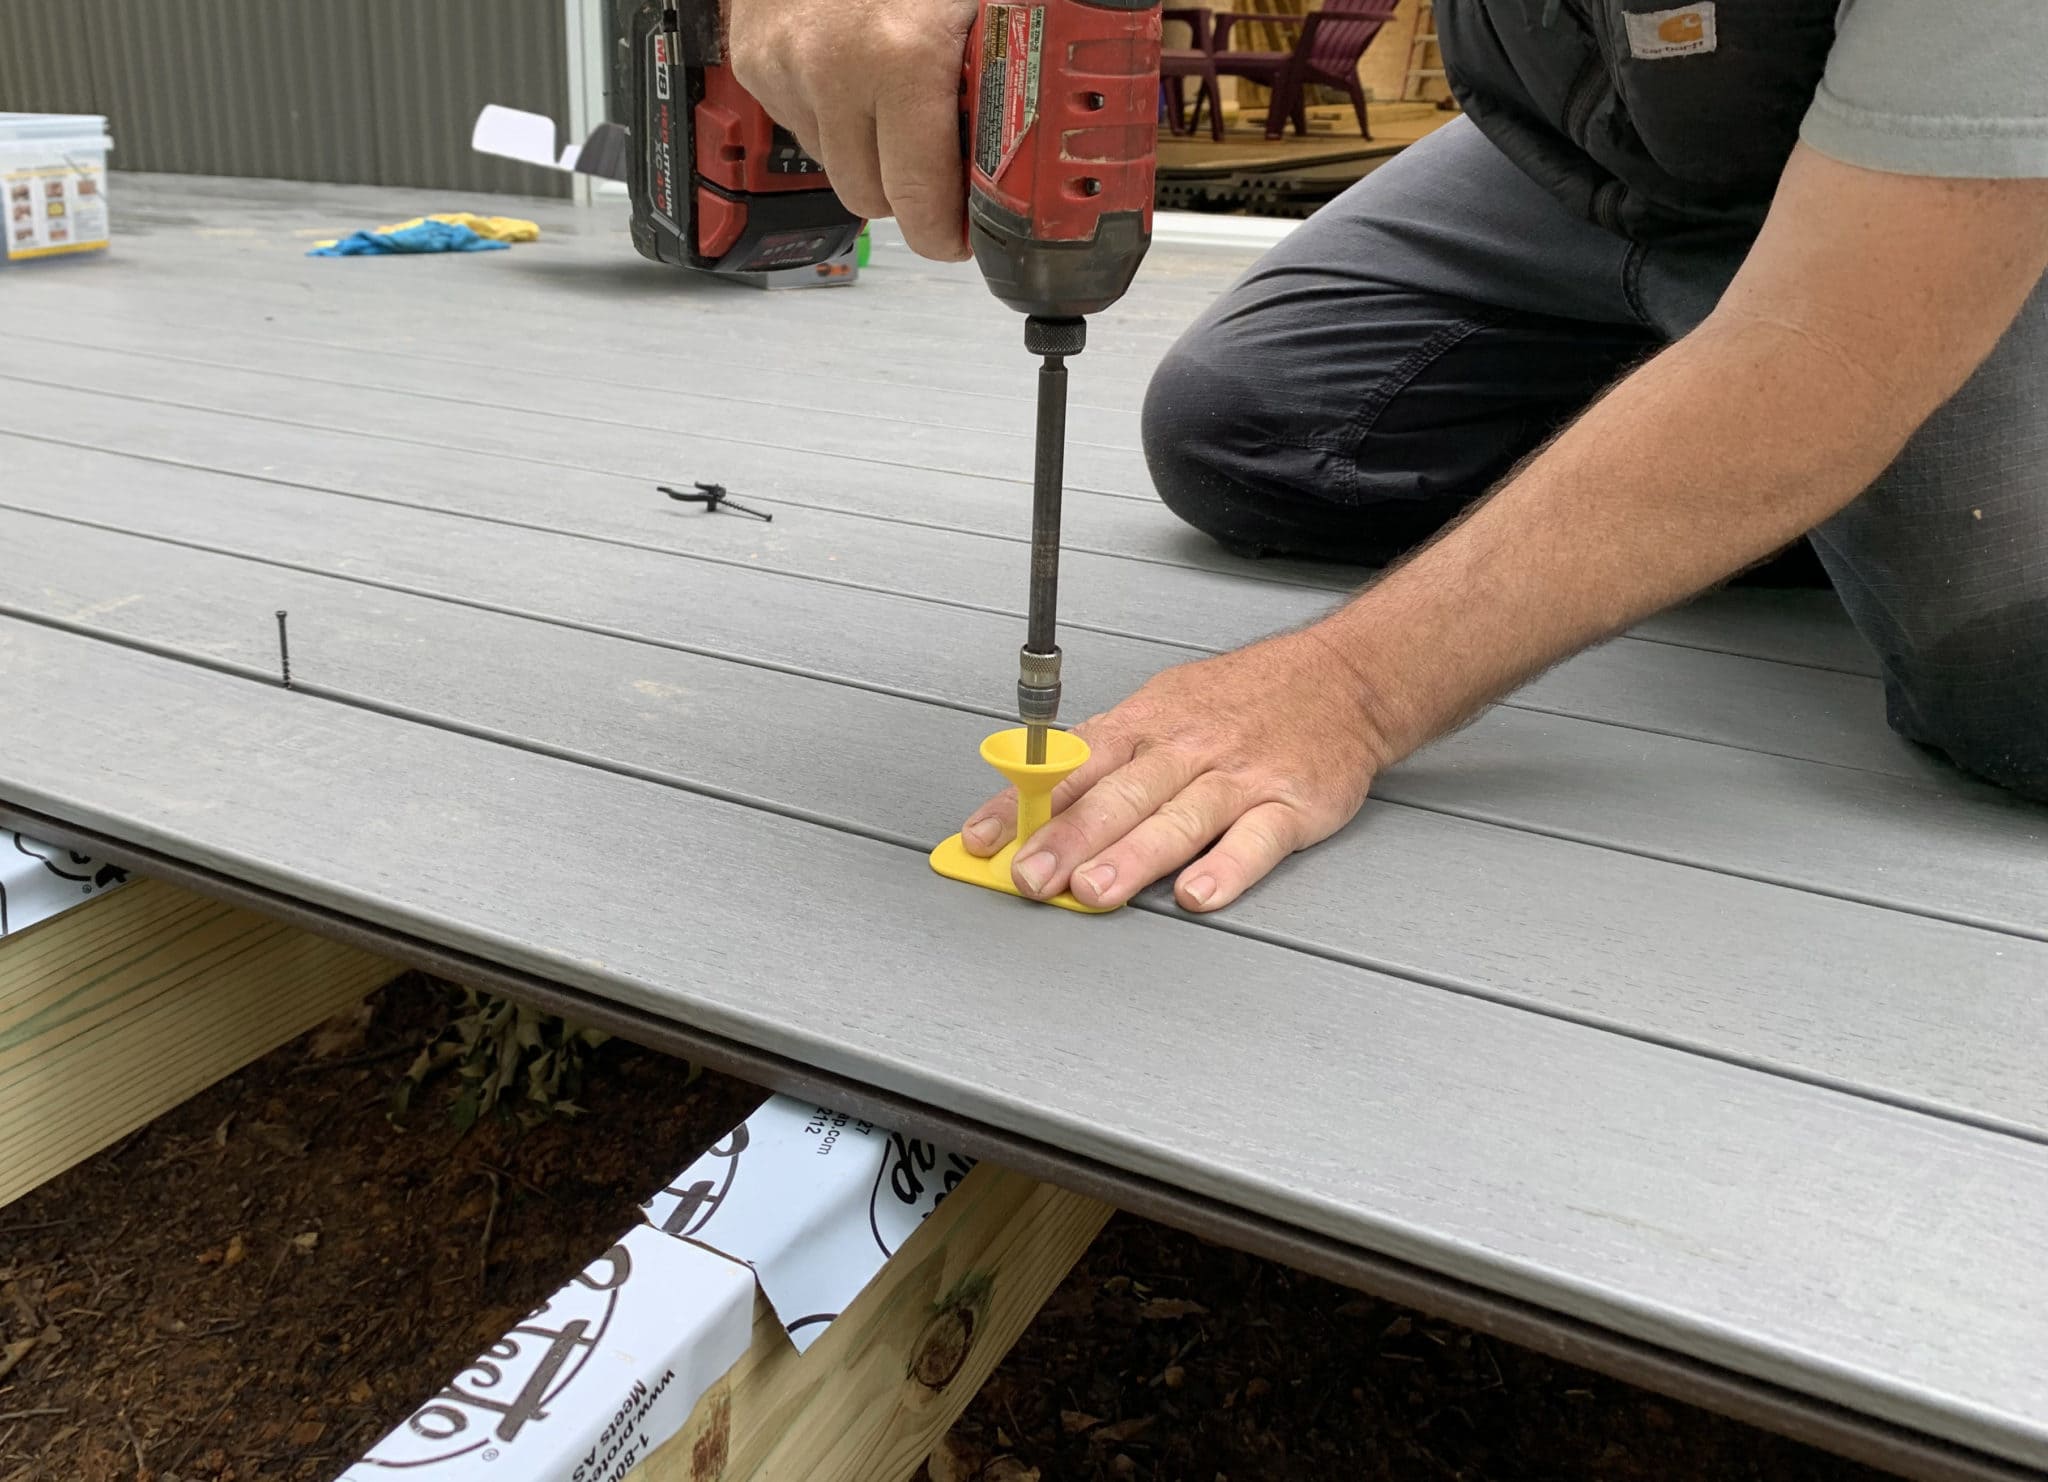
For dead-on fastener accuracy, use the CAMO Never-Miss Guide to place the screw.
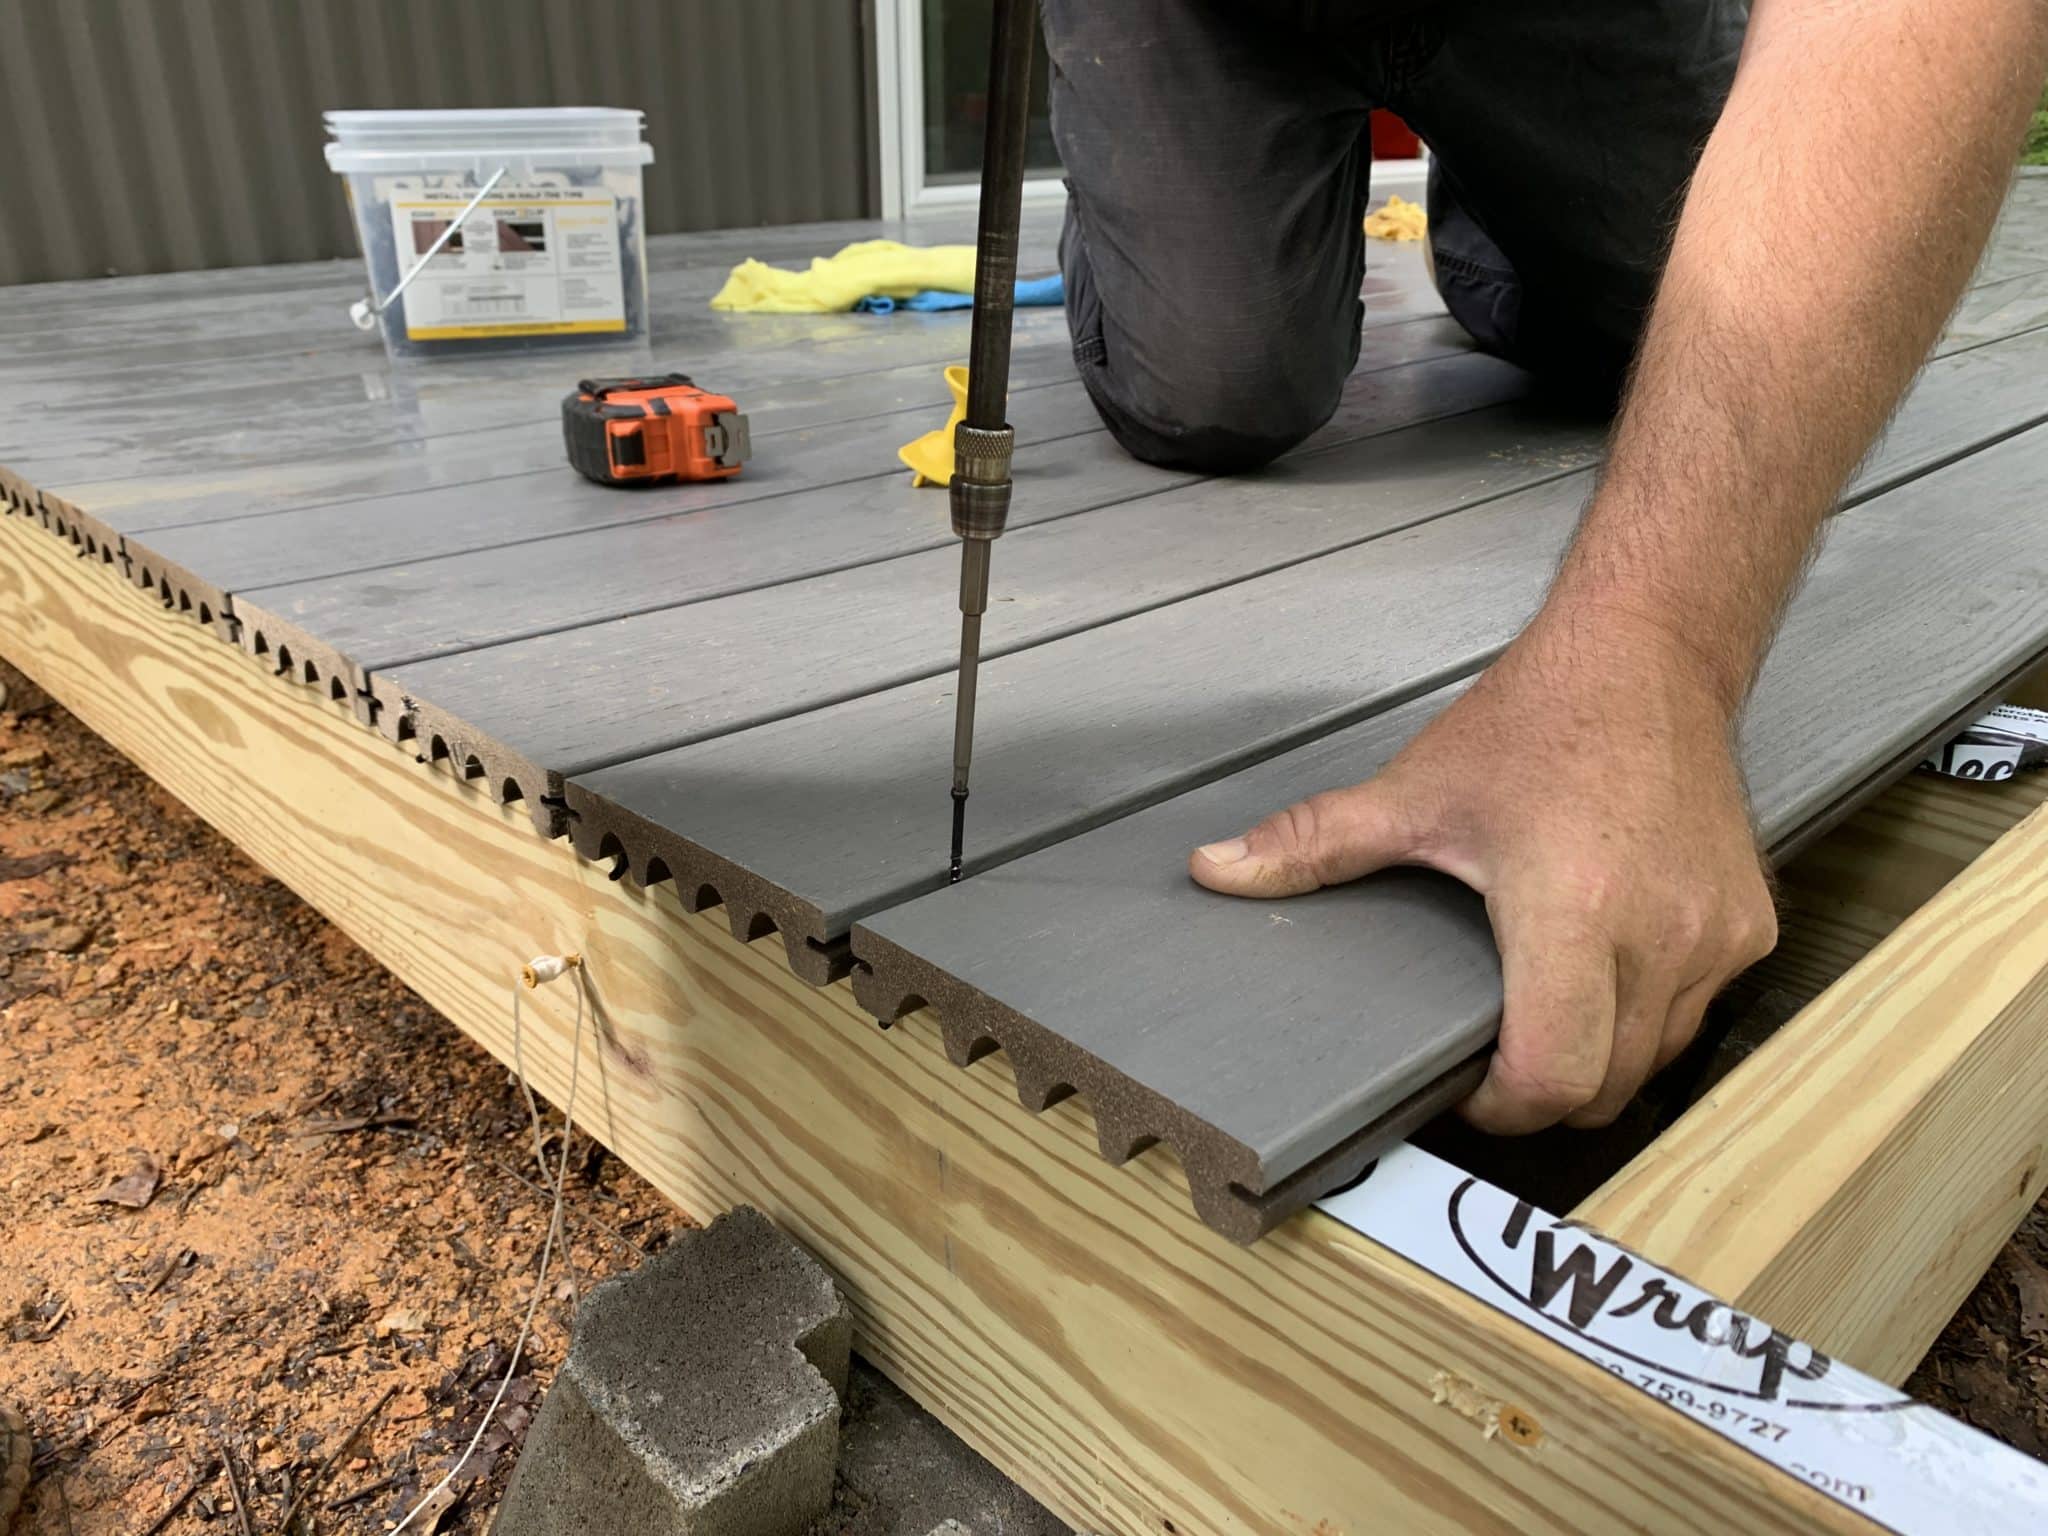
The scalloped profile of the Elevate decking conserves material, which not only reduces board weight but lessens the cost to only 15% higher than when building with wood deck boards.
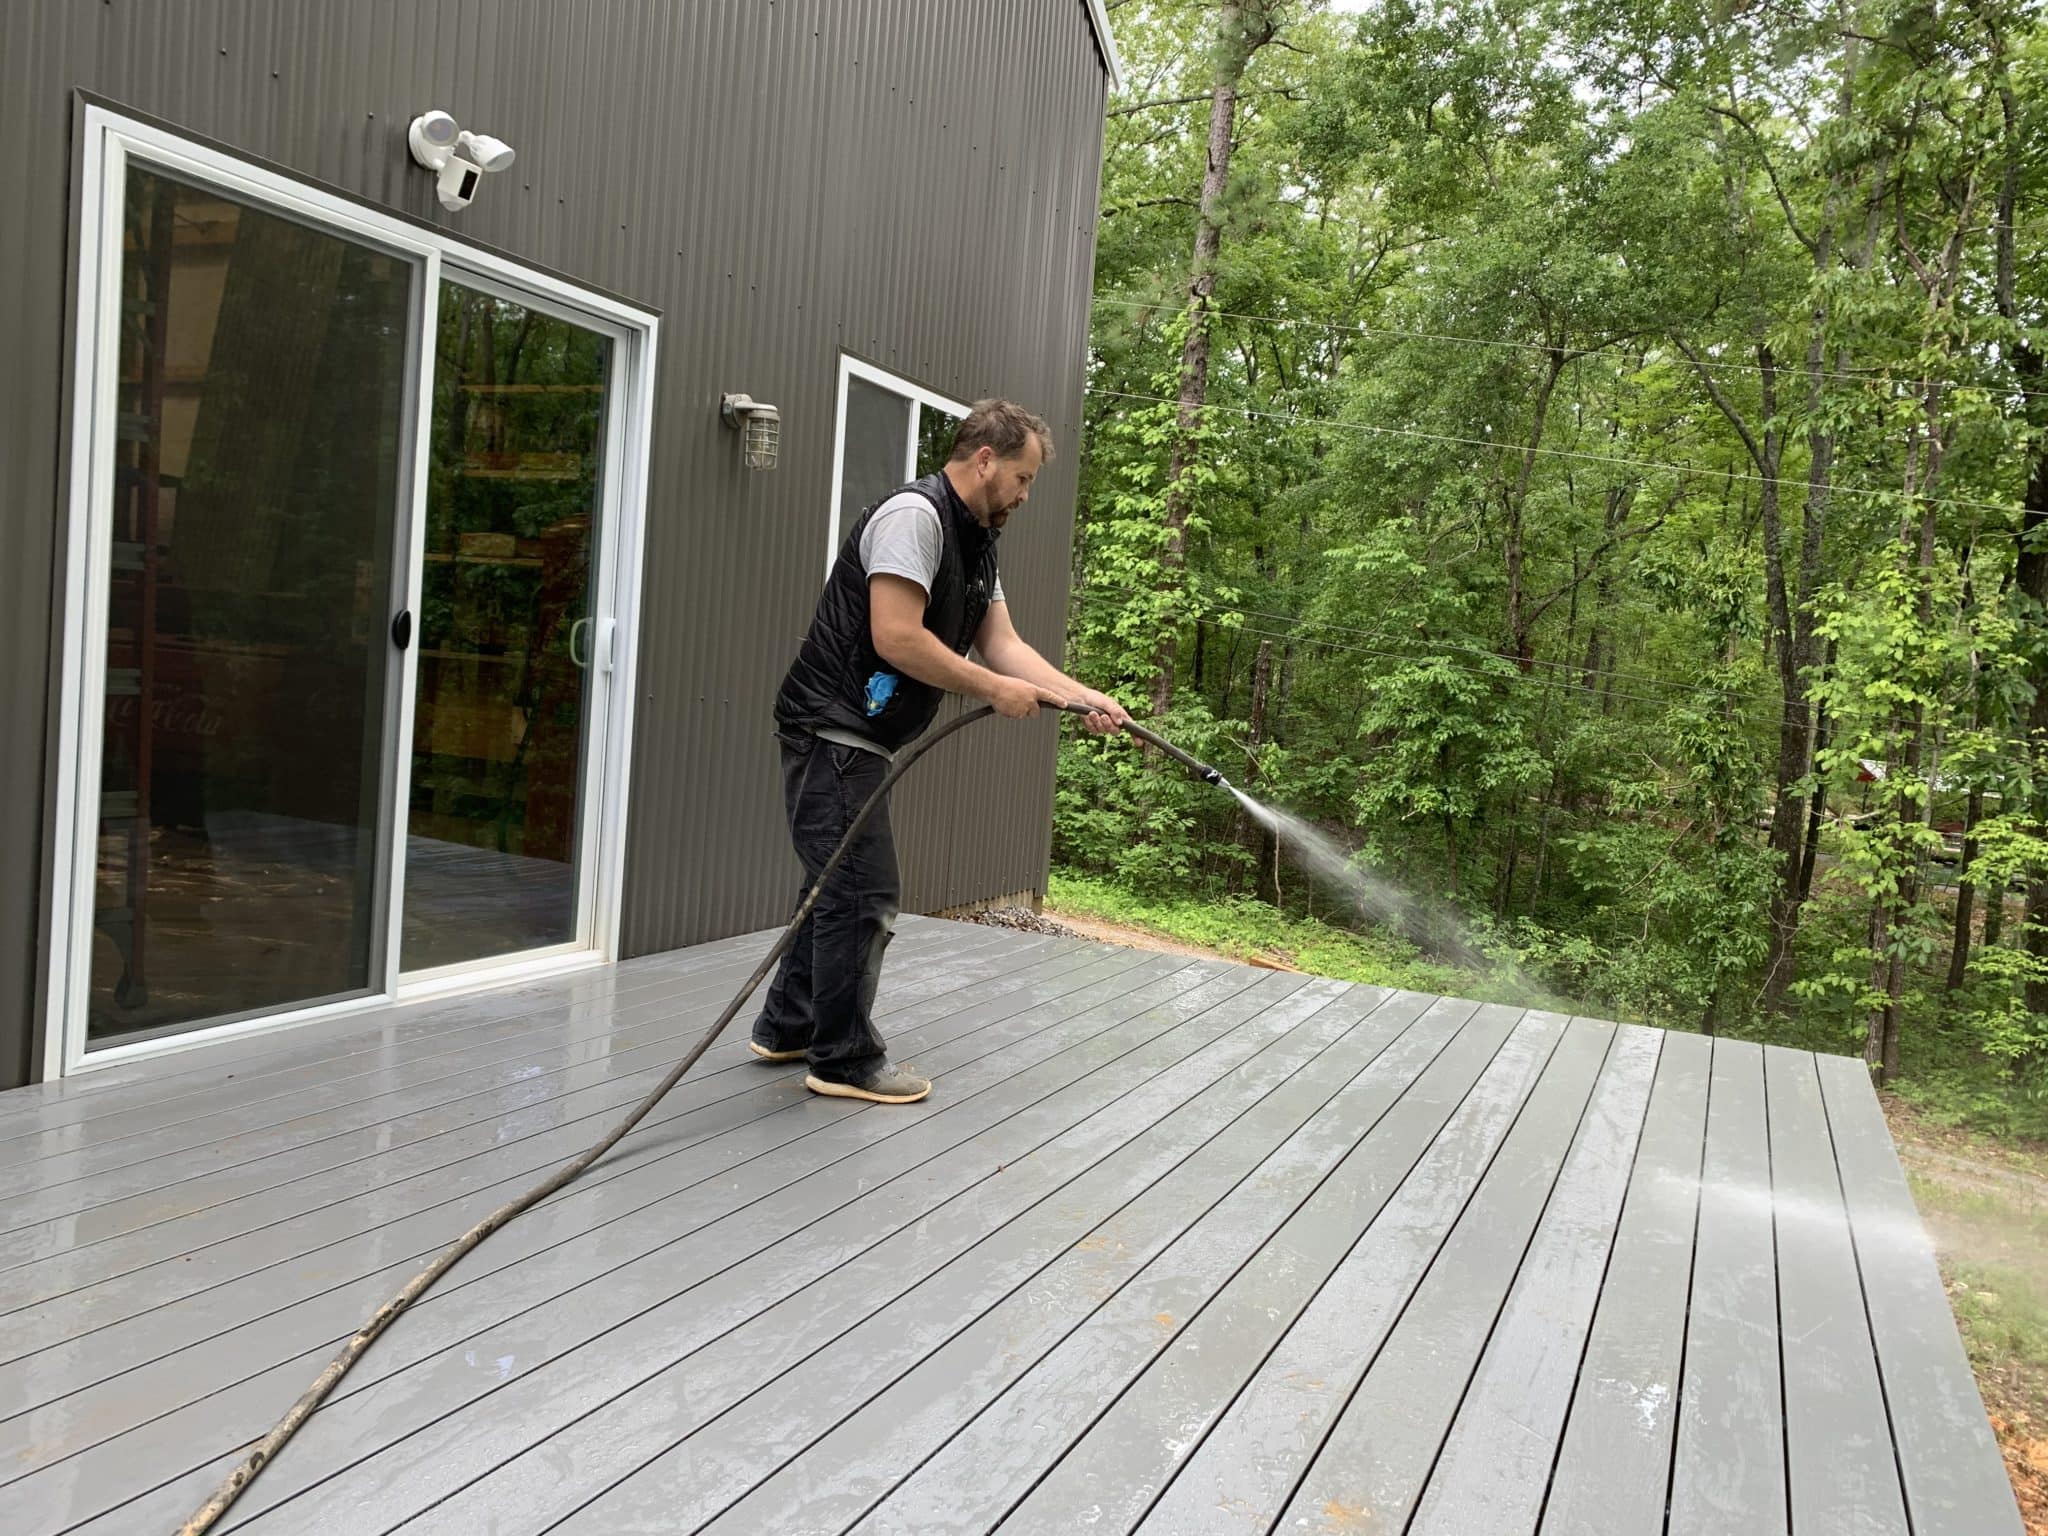
The Elevate capped composites are prefinished, moisture-proof, and easy to clean.
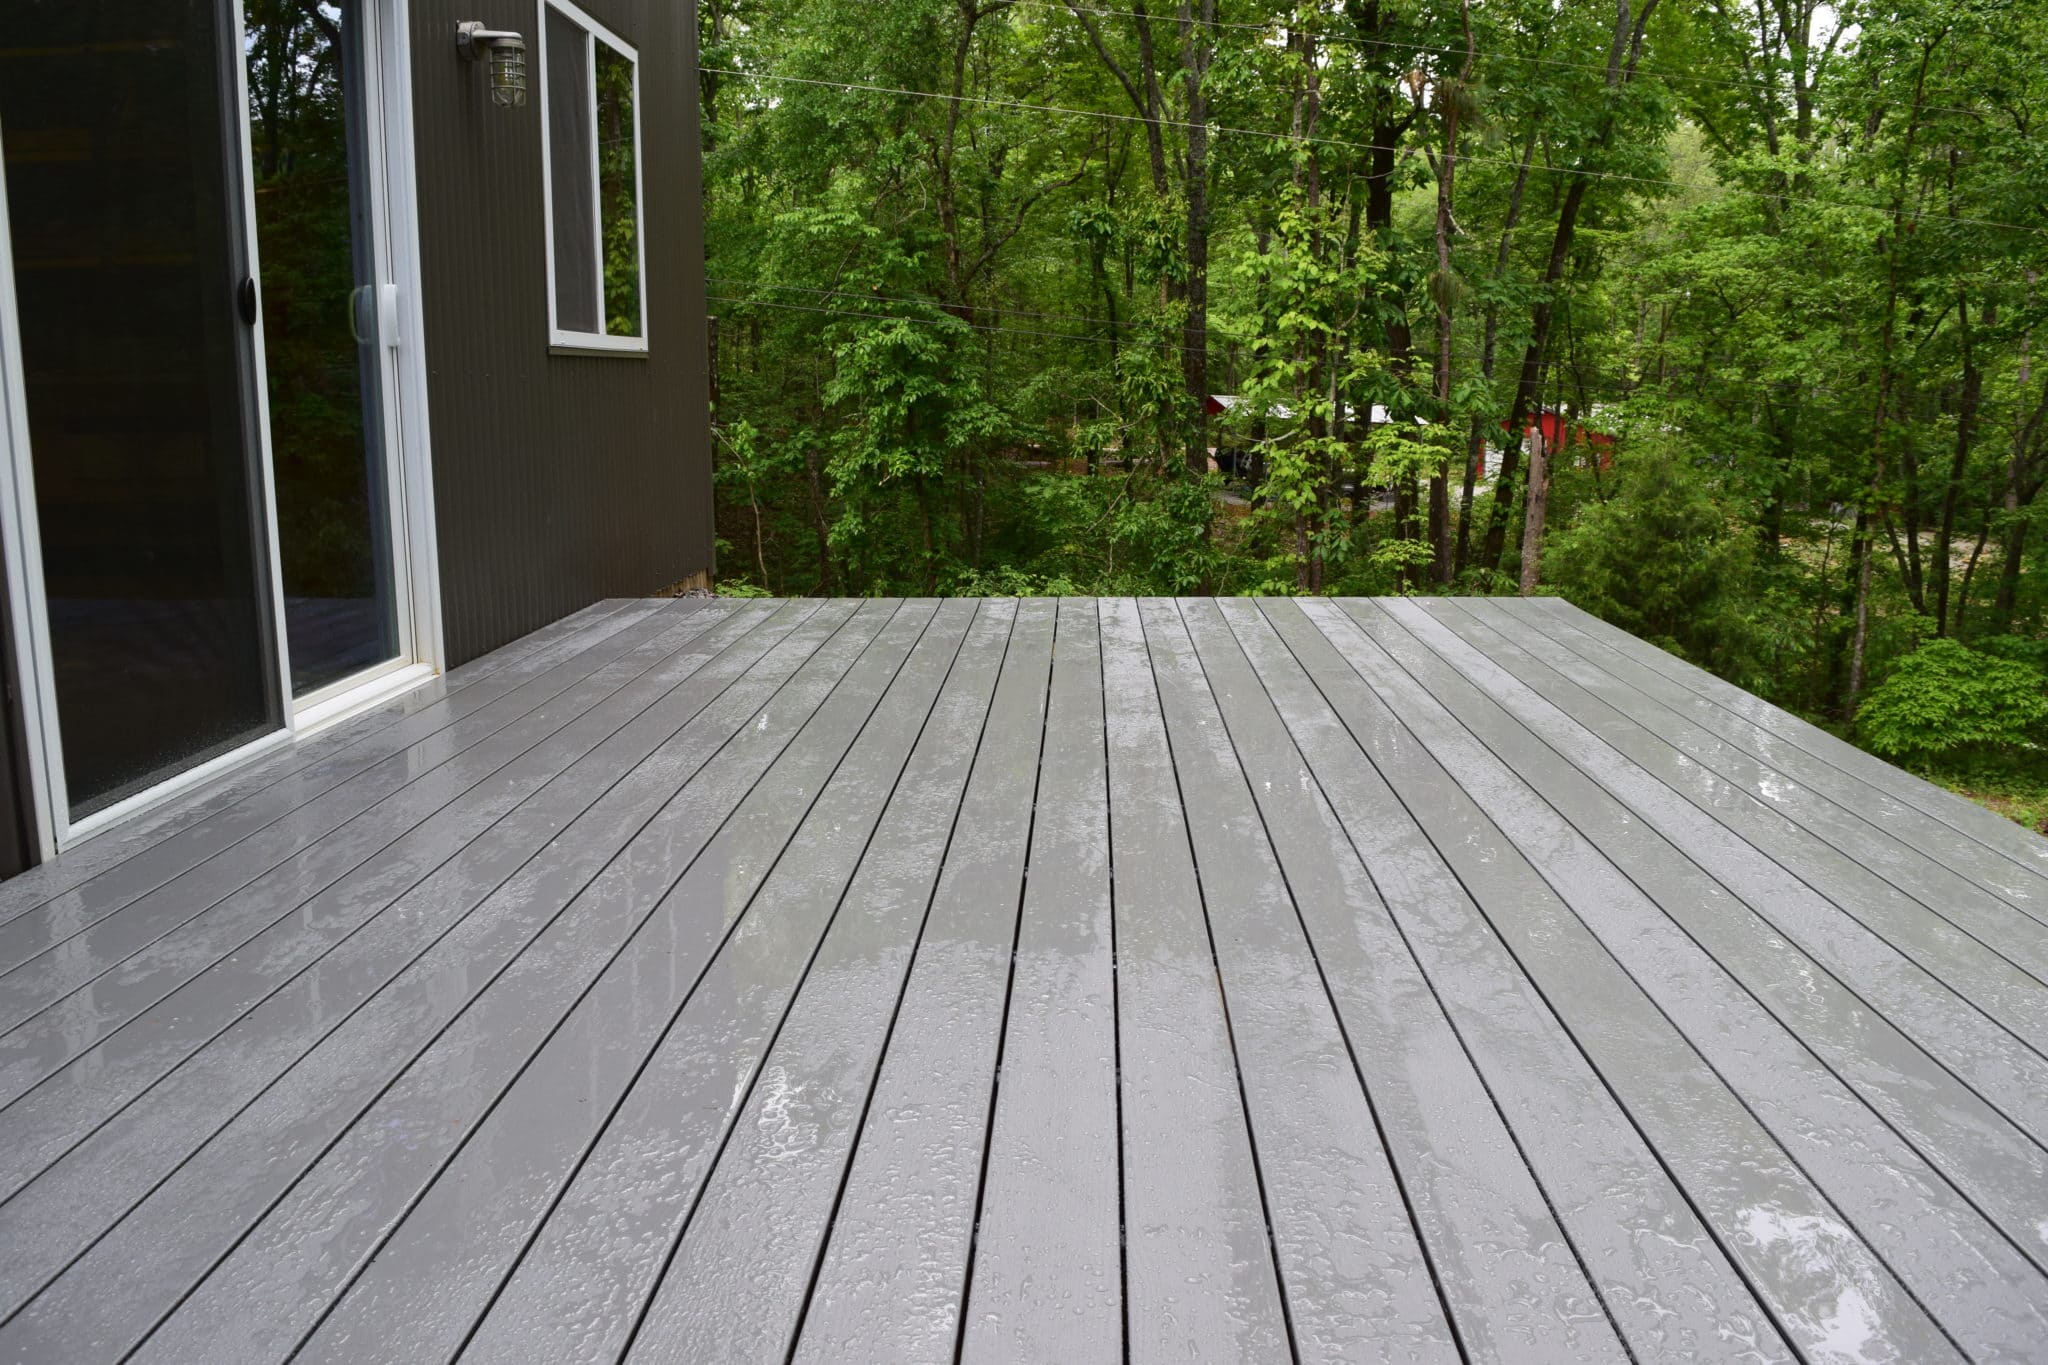
By using full 16′ boards and CAMO® EDGE Clips, Joey’s deck has a clean, sleek appearance with no end joints or visible fasteners.
For more information on Elevate decking, visit www.moistureshield.com. To learn more about CAMO hidden deck fasteners and the CAMO LEVER, visit www.camofasteners.com.
